T4.5 Eurovan Coolant Bottle Bracket Adapter

We had to make a custom adapter for a T4.5 Eurovan Coolant Bottle Bracket Adapter the other day. We needed a new coolant reservoir for our customer’s 2001 Volkswagen Eurovan VR6 MV. The warehouse sent me the wrong reservoir (Ver C, and not a Ver E). (701 121 407 E). The Ver C is for 1999-2000 Eurovans with a 12v VR6 engine, however all the connections and hoses are the same. It’s just 180º off from the one we needed. Apparently the Ver E coolant reservoirs are no longer available (NLA) and virtually impossible to find. We searched Classic VW parts, eBay and other sites and came up with zero results. Ver C is still available, however it is also hard to find, but they are available special ordered new from Europe. If you need a Ver C reservoir, we can get one for you.

Instead of wasting time trying to find a new one, or installing a used part, we drafted a file in Fusion 360. Then we 3d printed this bracket. Printed with PA12-CF Polycarbonate Carbon Fiber (25%CF/75%Poly). The bracket is safe up to 220c / 428ºF. This will adapts the older C style bottles with the overflow return on the left / drivers side. These other tanks are readily available. Furthermore, this will fit so the left / drivers side electrical connection (coolant level sensor) fits the configuration for Eurovans with the Ver E bottles. Fits 2001+ T4.5 Eurovan / Transporter / Caravelle – 24v Engines, with the bottle that mounts to the core support. We also installed some brass inserts so we can just bolt it right in and the tank can be replaced it in the future, if need be.

Version 2.0

We revised our design a little to make it both easier to print and use less material. It’s just as strong as Ver 1.0.


More Info

For more information on how to get your Volkswagen Eurovan Repaired, please call 425-254-0627. You can also email us by clicking here. Meister Werks European & Import is located one block south from The Renton Landing in Renton, WA, across the street from the former Boeing Store and on the westside of the Paccar / Kenworth plant.

Purchase

If you would like to purchase one of these. You can do so by clicking the link below. These are made to order, so the turn time on these is approx 3-5 days to ship + shipping time.

Click Here to go to the shop site.


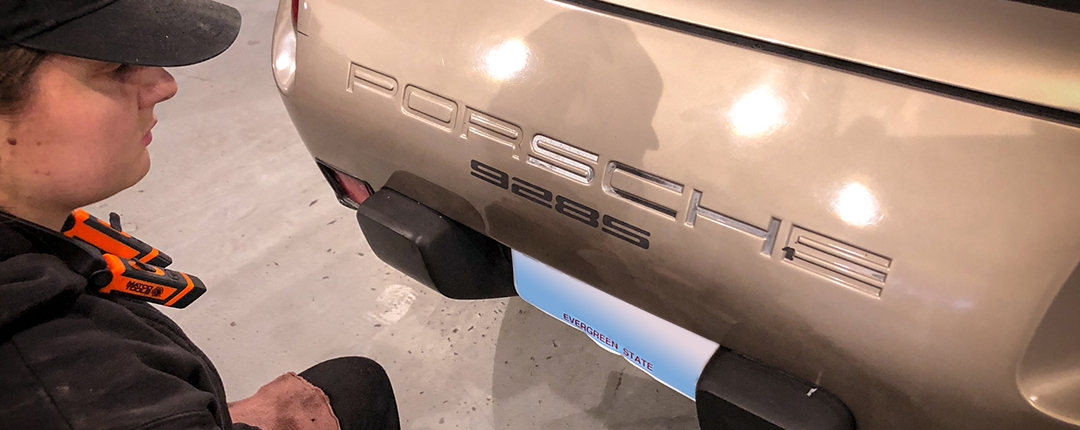
This 1984 Porsche 928 S has been in the shop for some repairs, service, and minor restorations. It was a gray market car, imported to the USA and originally sold in Germany.  Some modifications had been performed at different shops previously that was not to our customer’s liking.  One of the items we repaired in house was rebuilding the transmission and repairing the broken gauge cluster. Another item was trying to find a new old stock OEM exhaust to replace the awful sounding aftermarket exhaust – which to our amazement, we did. Another item on our customer’s wish list was to source a original lower center, 928 S bumper grill.

Sourcing the Grill

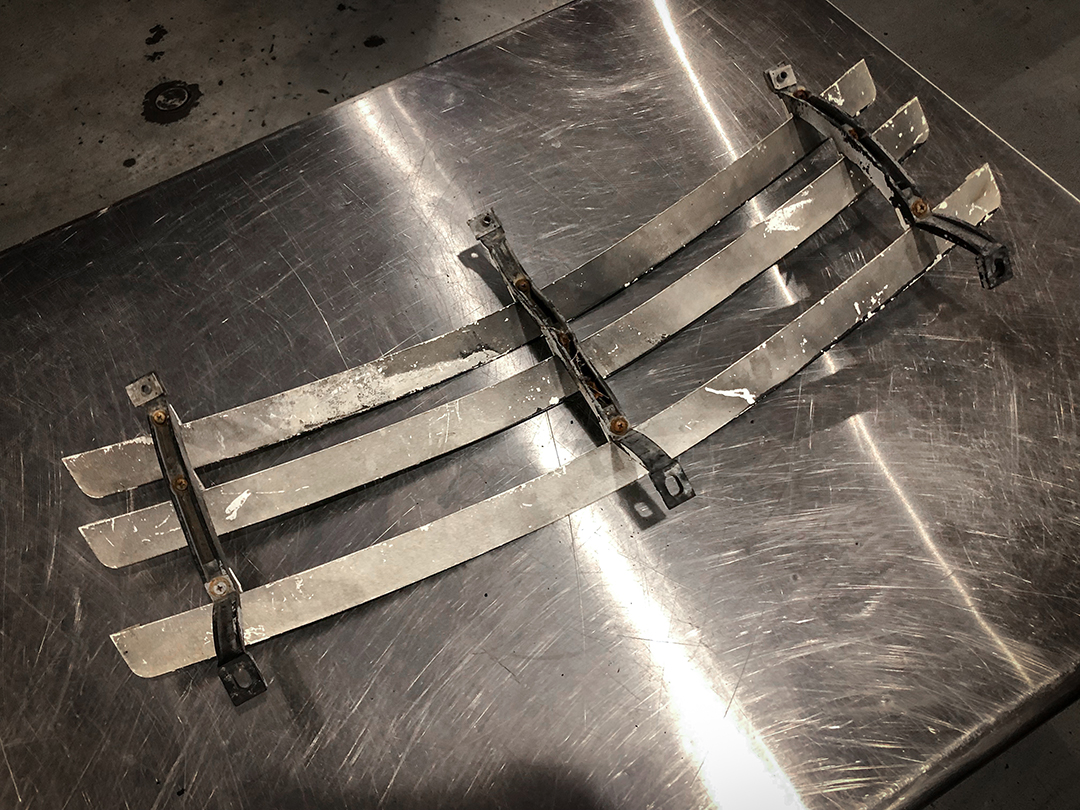
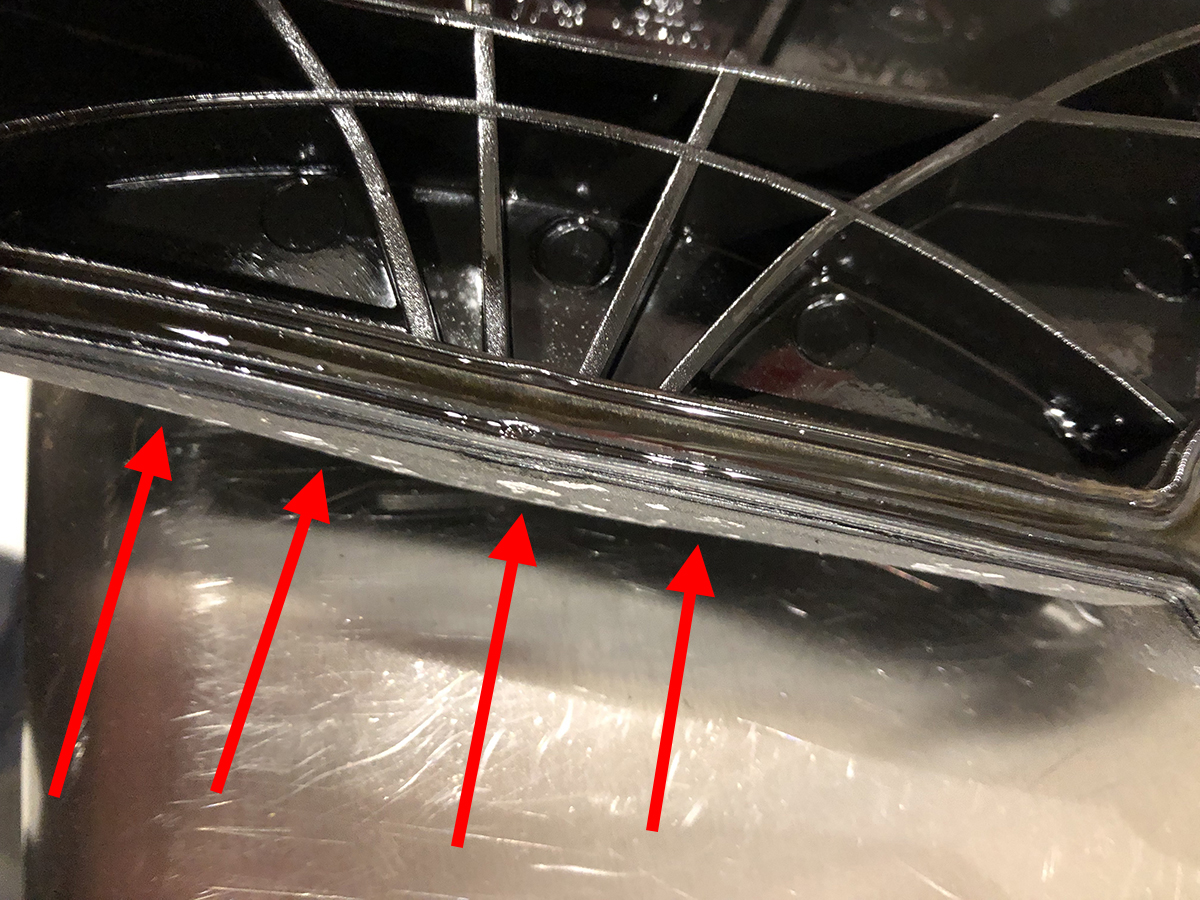
We were able to source a complete unit, in decent shape, which was not inexpensive even in this poor condition. We looked over the product listing photos and knew a thorough restoration was going to be necessary. This was definitely something we knew we could tackle in house. These photos below show the condition when the grill arrived.

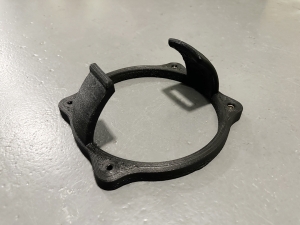
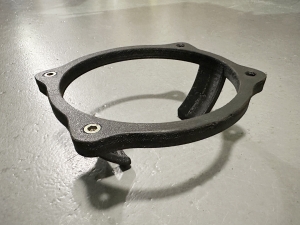
When we received the grill we noticed all the hardware was rusty, so that would need to be refurbished or replaced. Also, the plastic brackets that hold the aluminum grill inserts were painted. They were also on the brink of breaking and extremely flexible. Those would also need to be replaced. Even though the brackets are still somewhat available on some specialty websites, we had an idea on how to upgrade these while still retaining the OEM look. Since we have multiple 3d printers in house, this technology was first thing that came to mind.

Disassembly

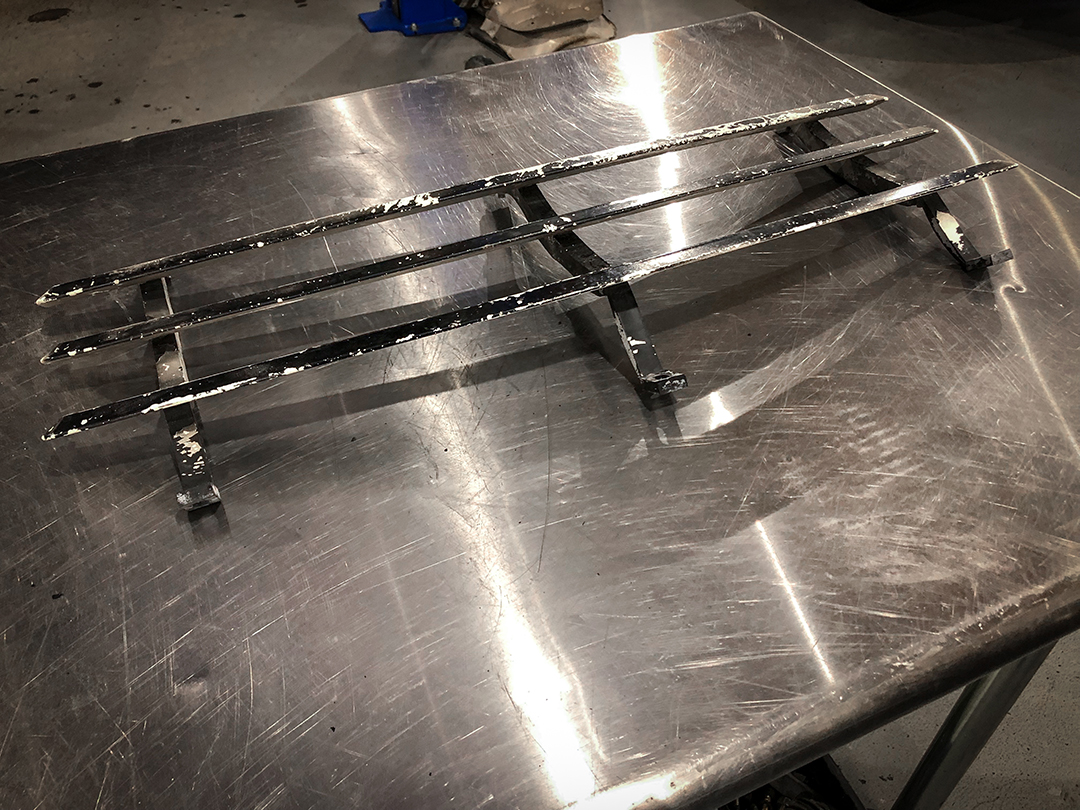
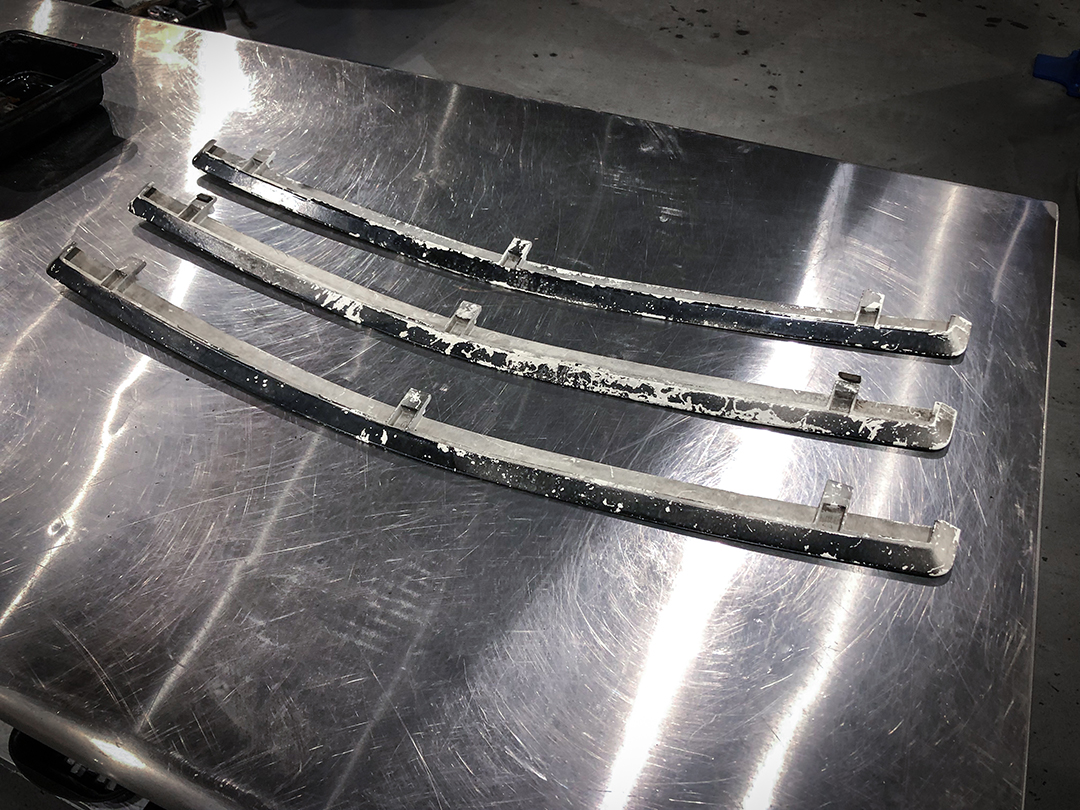
First, we started by disassembling everything and bagging and inventorying all the hardware. We took the metal grill inserts to our in house powder coating department to get stripped, blasted and coated.

Drafting the CAD Files

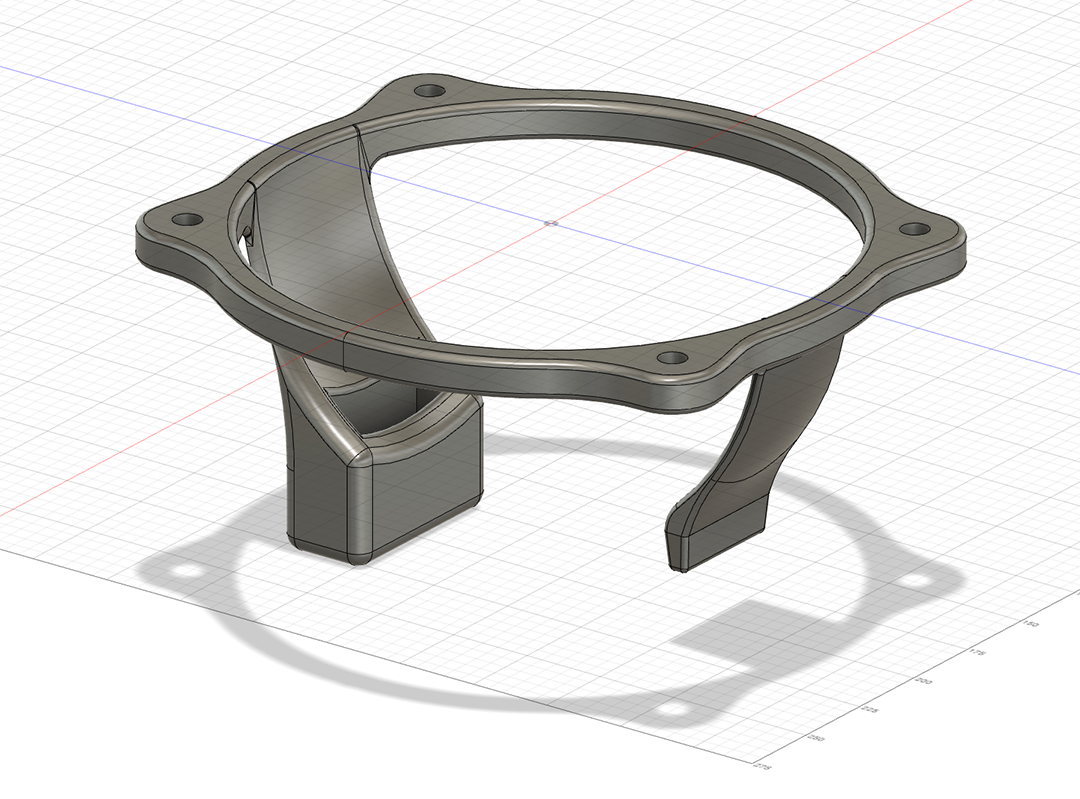
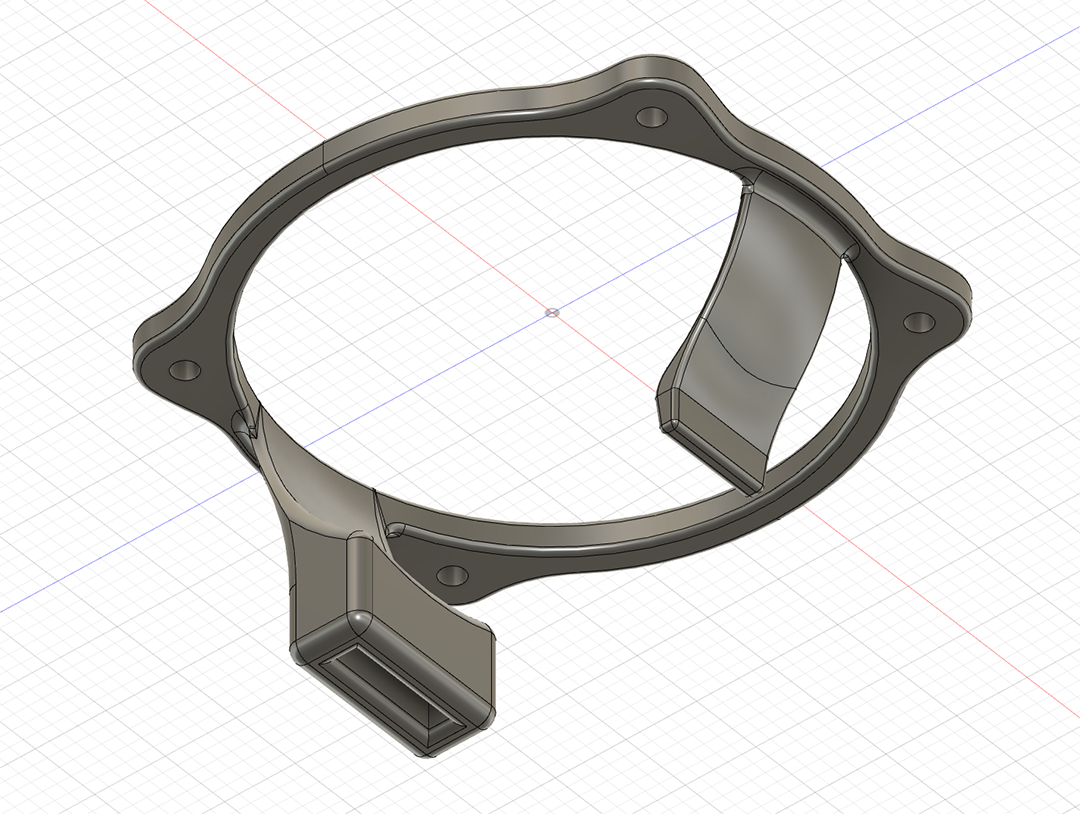
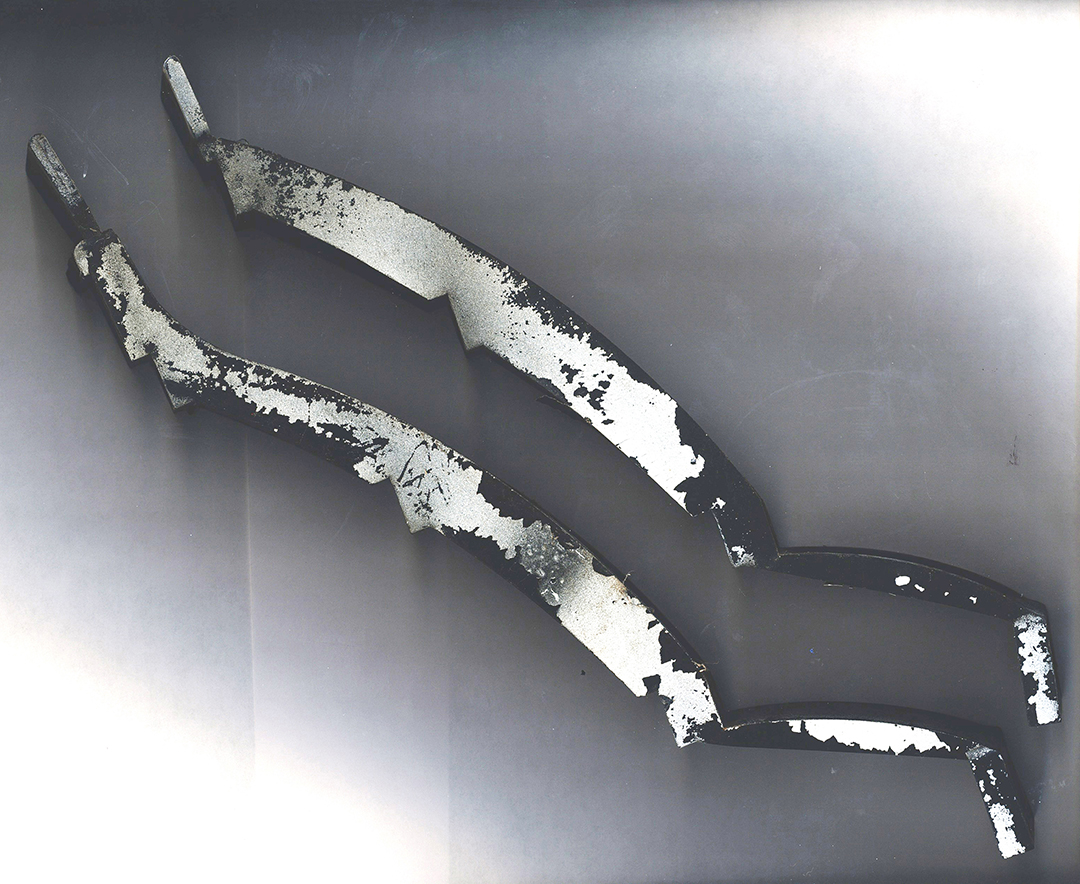
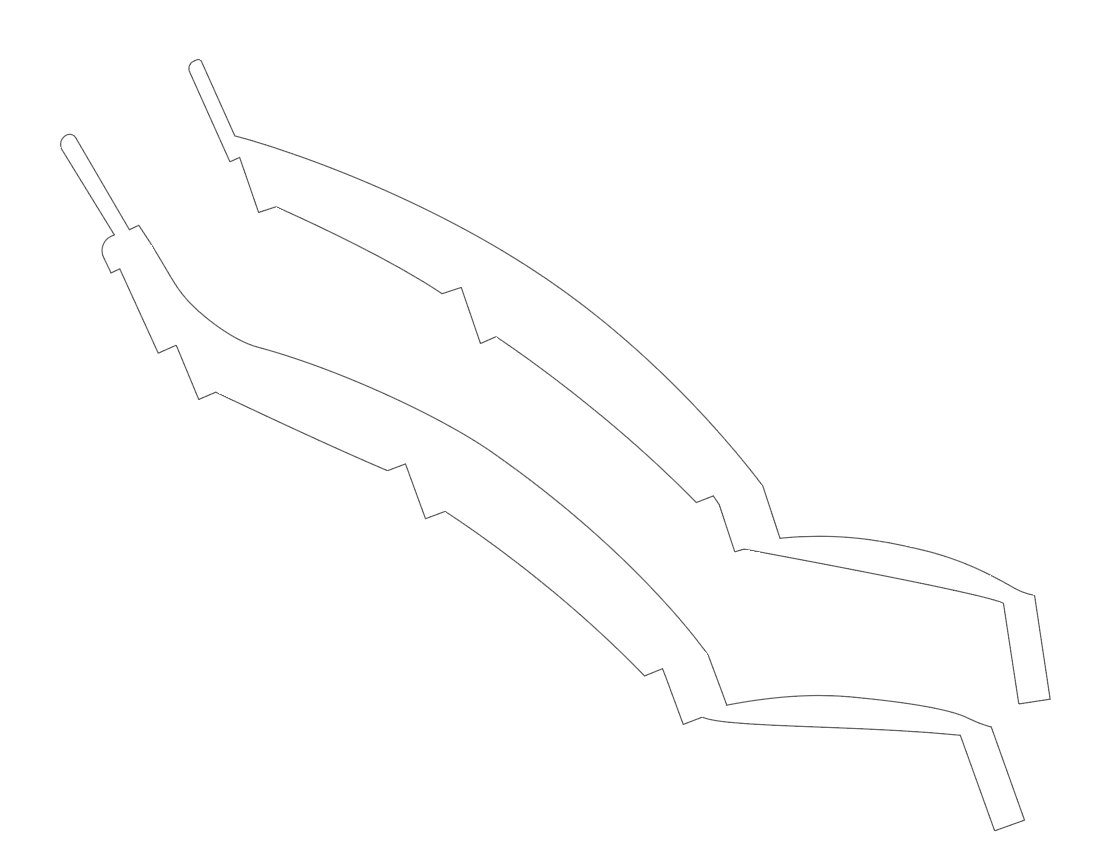
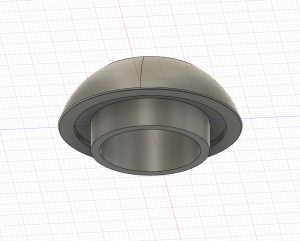
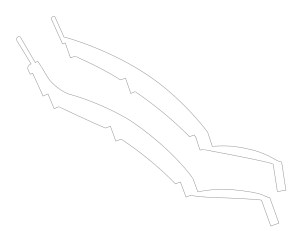
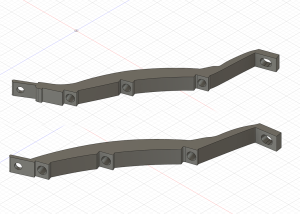
While the grill inserts were in powder, we took the brackets and scanned the profile them on a flatbed scanner. Since flatbed scanners, scan to a 1:1 ratio, we knew the profile sizing and dimensions on screen would be 100% perfect. We took the scans into Adobe photoshop and manipulated the contrast to make it easier to see the profile. After that, we saved the file and imported it into Adobe Illustrator. This is where we created vector outlines of the center and outside brackets. After the profiles were established, we deleted the imported scanned image and exported the file to a CAD format. We imported that into Fusion 360, where we drew up our 3d model for printing.

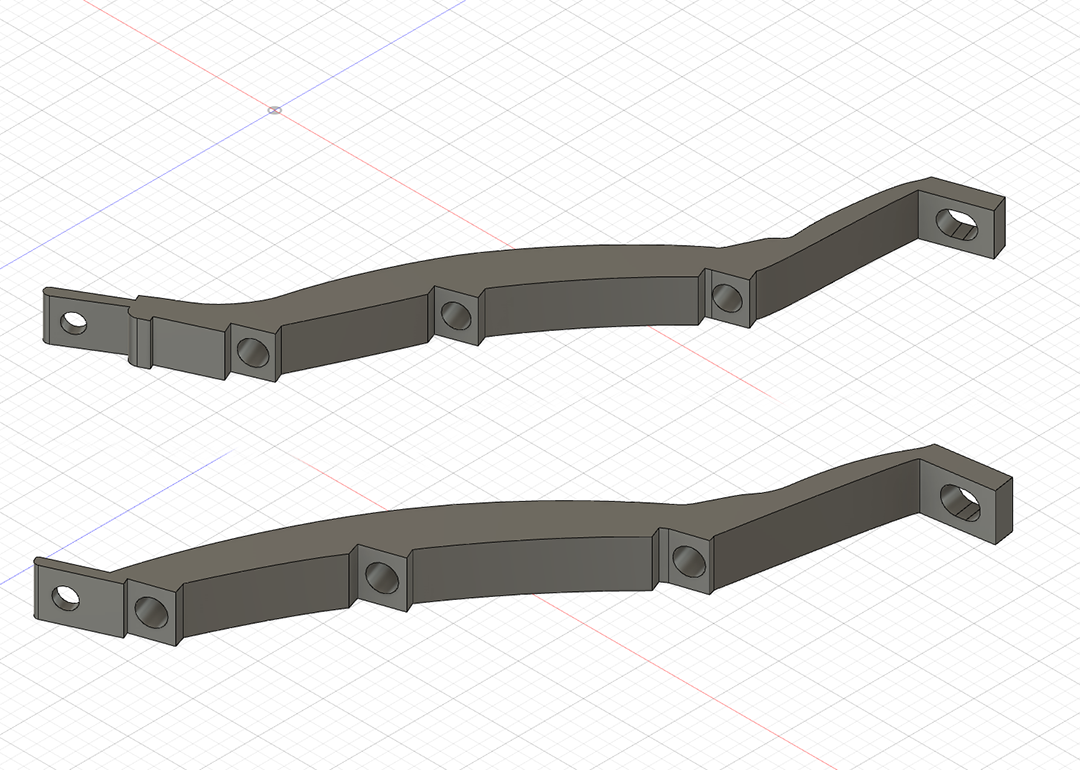
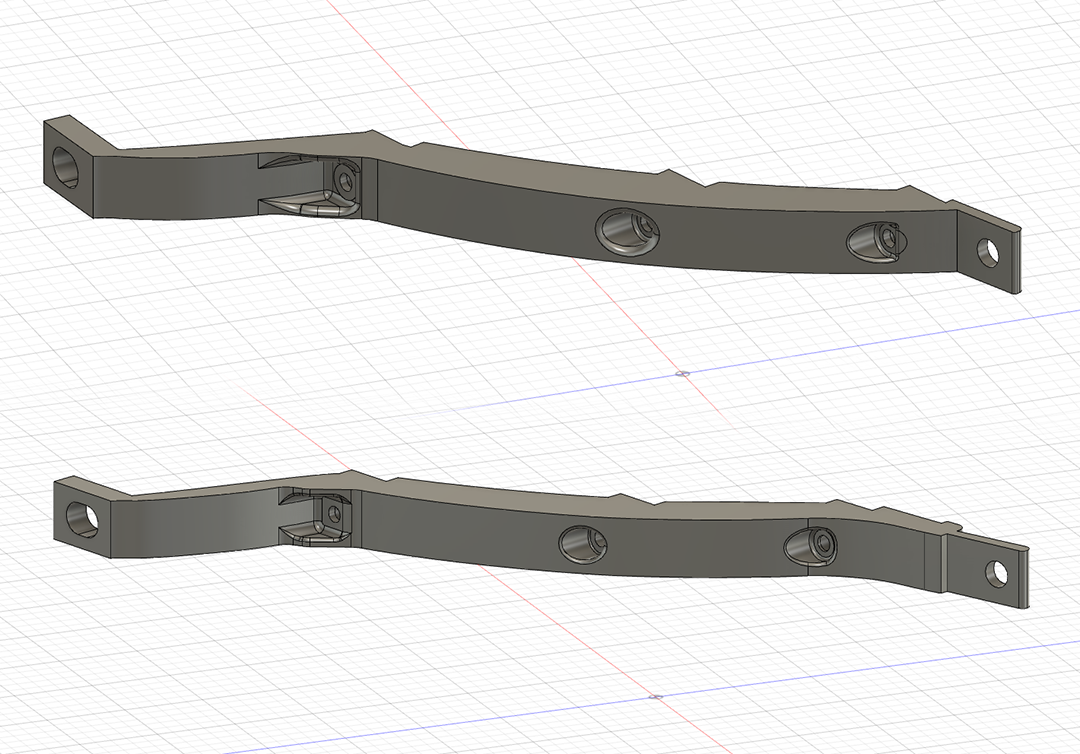
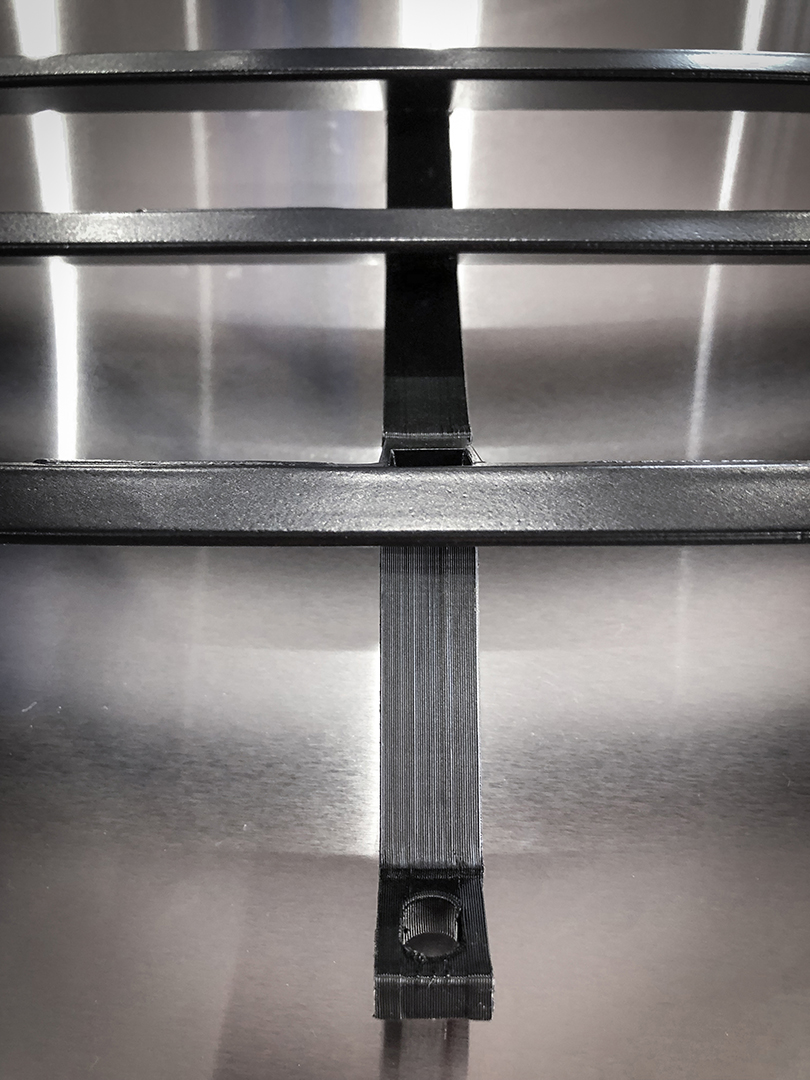
While in Fusion 360, we added additional supports, removed all the recesses that the OEM bracket have and pocketed each of the 5mm screw holes. Below is the transition of the files, from start to finish.

After the Fusion 360 CAD drawings were complete, we exported these to a .STL file and sent them to the 3d Printer. Our AnyCubic Kobra Max is capable of printing 15.9″ x 15.9″ x 17.7″ Tall. We can print a wide variety of materials such as PLA, TPU, and for more industrial applications, carbon fiber nylon blend.

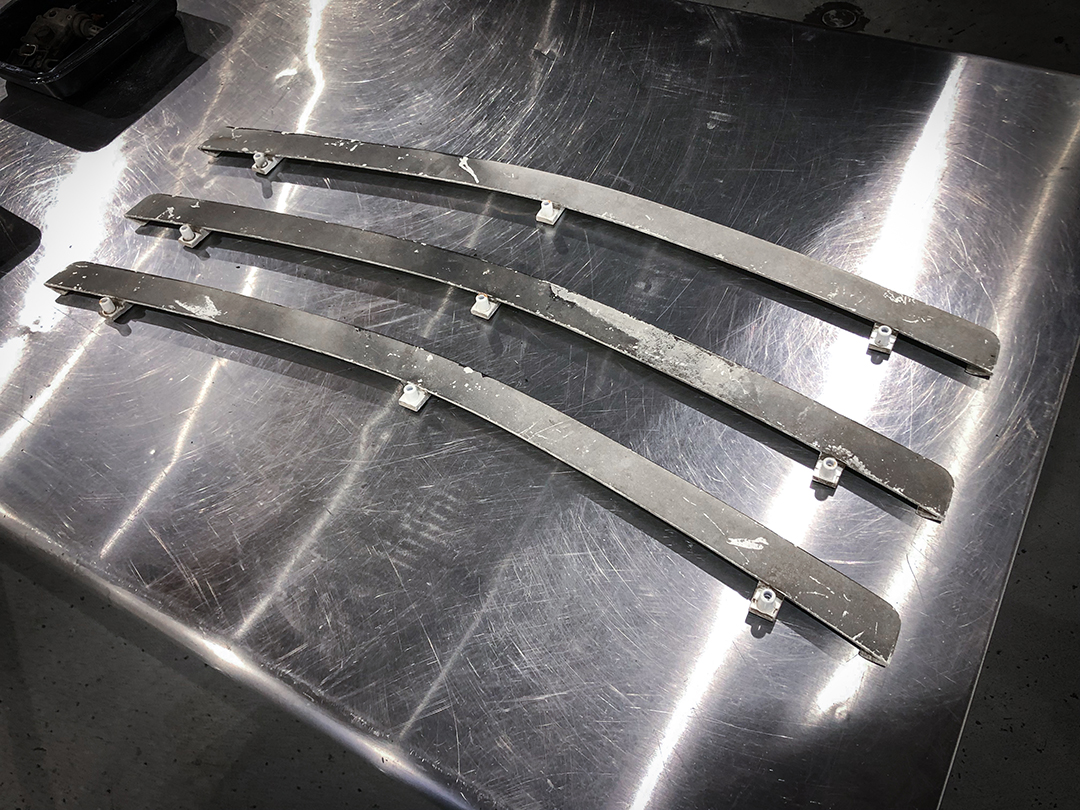
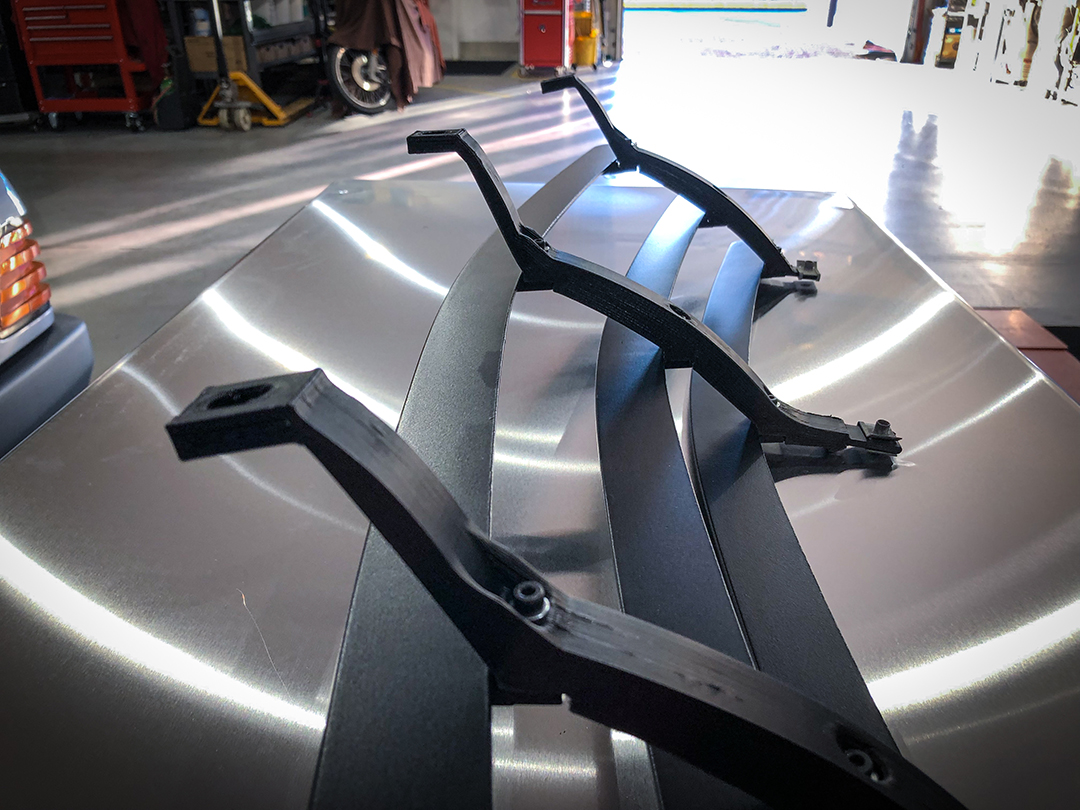
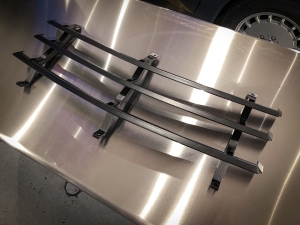
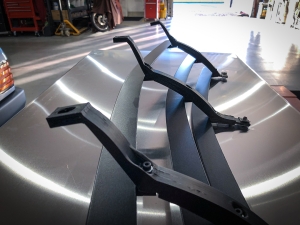
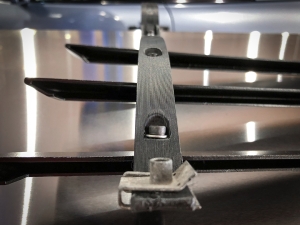
Once the parts came off the printer, we mocked up the grill inserts to the brackets. To our amazement, the brackets fit really well, directly off the printer. Immediately we noticed how much stronger these were compared to the OEM brackets. Furthermore, the reinforcements allowed for very little flex to the upper grill section. We performed some minor finish work and deburred the pieces. When the grill sections came out of powder coating, they would be ready to assemble.

Assembly

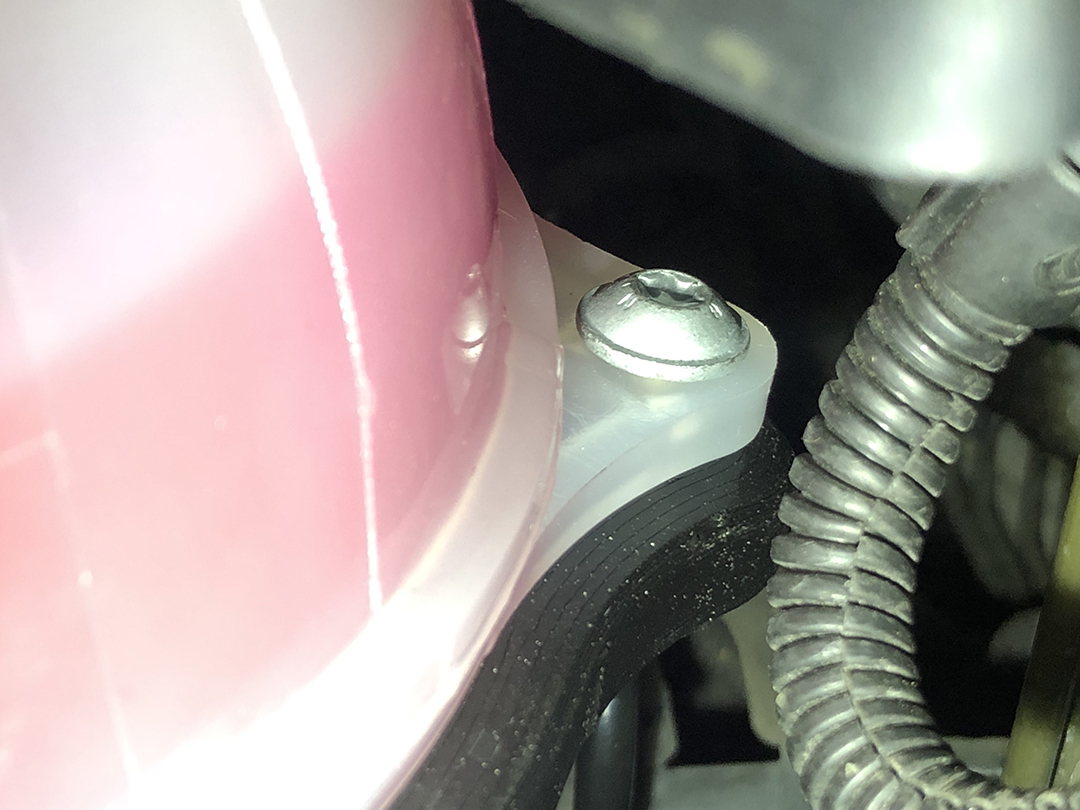
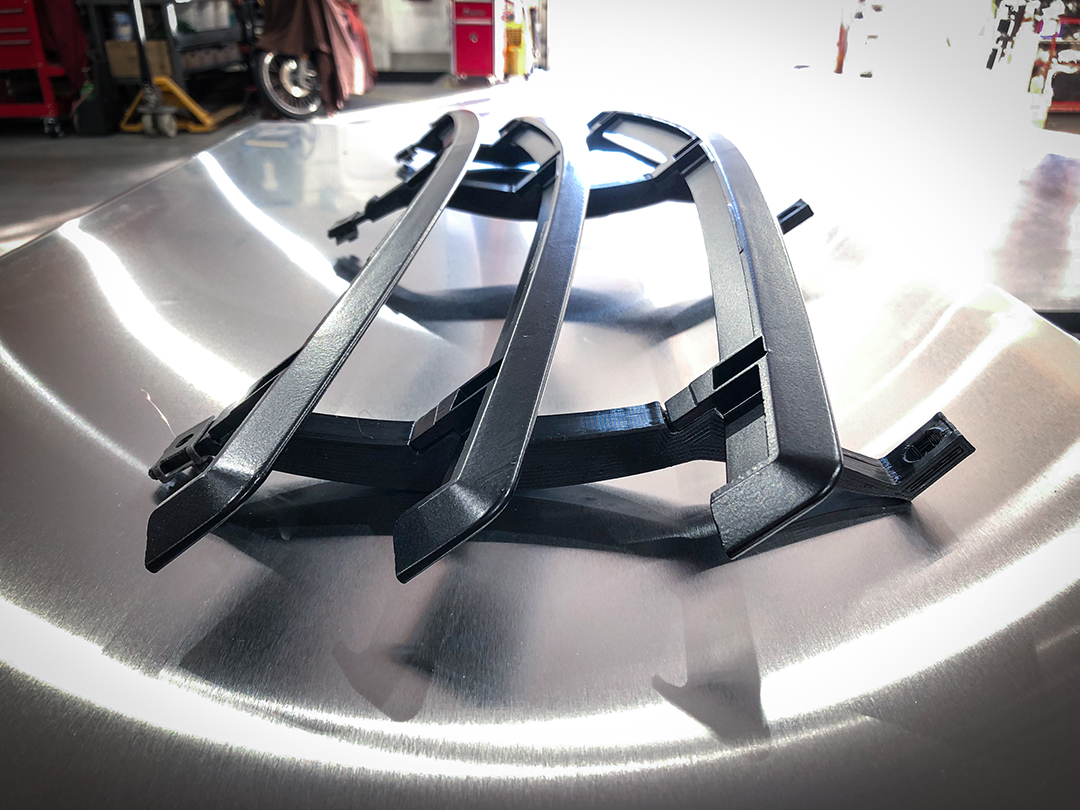
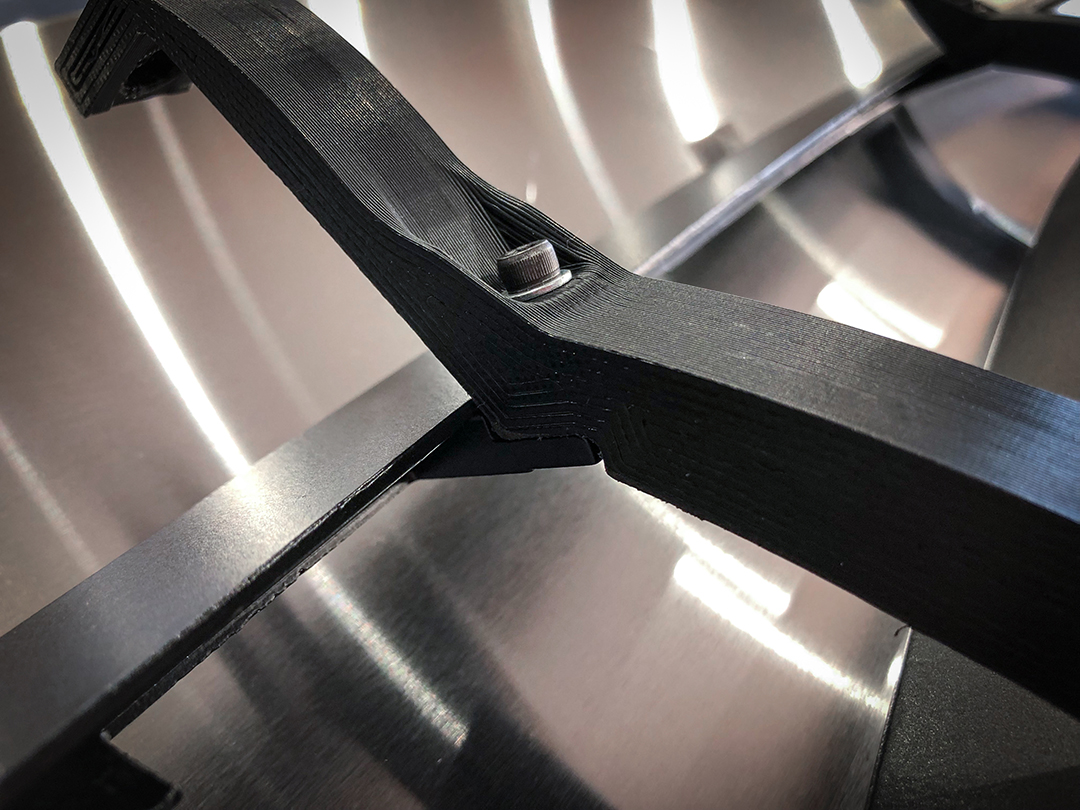
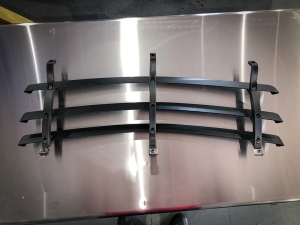
At this point in the project, the grill inserts were out of powder coating and ready to go with a fresh coat of Cardinal Powder Semi-Gloss Black T002-BK08. We now started assembling the grill. However, one thing that was not compensated for while designing the brackets was the thicker tolerances.  When we reinforced the brackets joints in programming, we made them thicker than the OEM measurements. Our hardware was a little too short. We sourced some metric black oxide socket head screws that were 3mm longer.
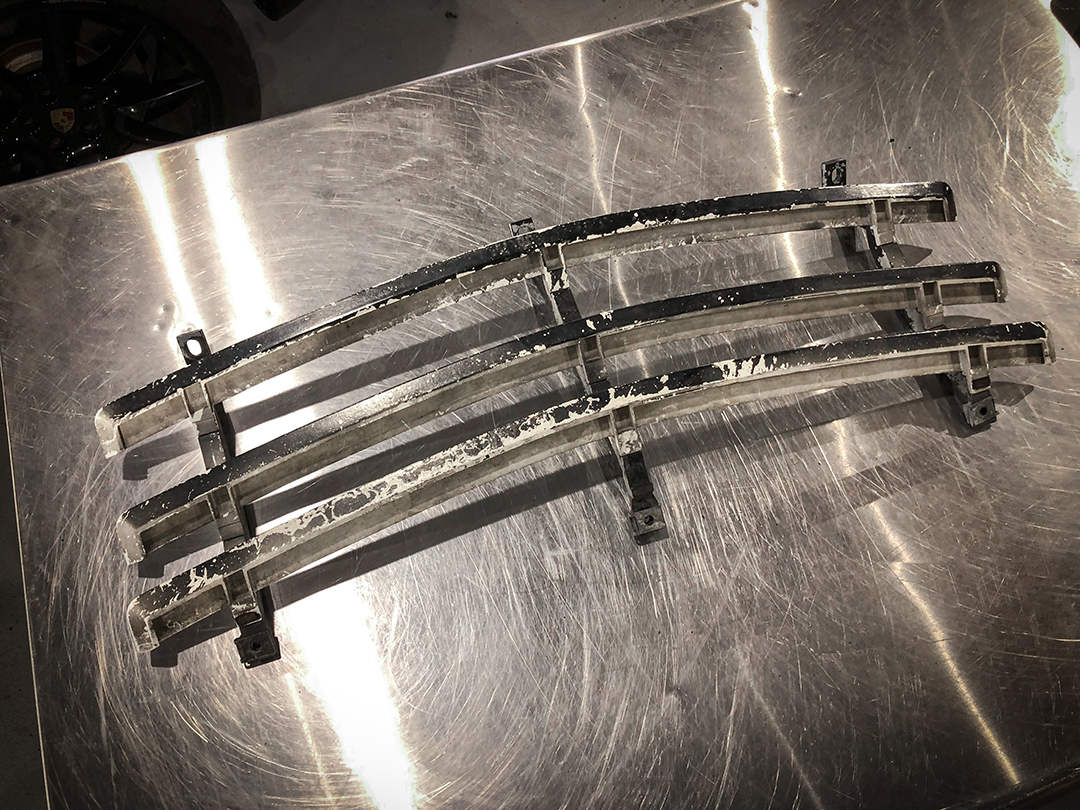
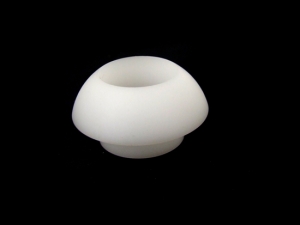
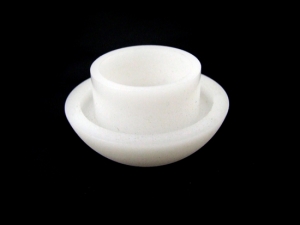
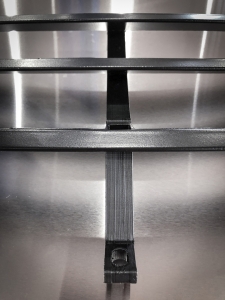
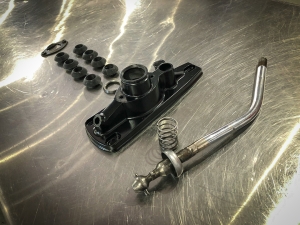
While installing the bumper grill, we found out a interesting thing. The North America (NA) bumpers grill brackets are different than the European E-Code bumpers. The brackets have a slightly different mounting location due to the fact that they are slightly shorter. To sold this, we had to modify the lower mount to be able to accept the NA brackets. It wasn’t worth printing new parts as we just had to drill a hole in each lower bracket and trim off the bottom tab just a little.

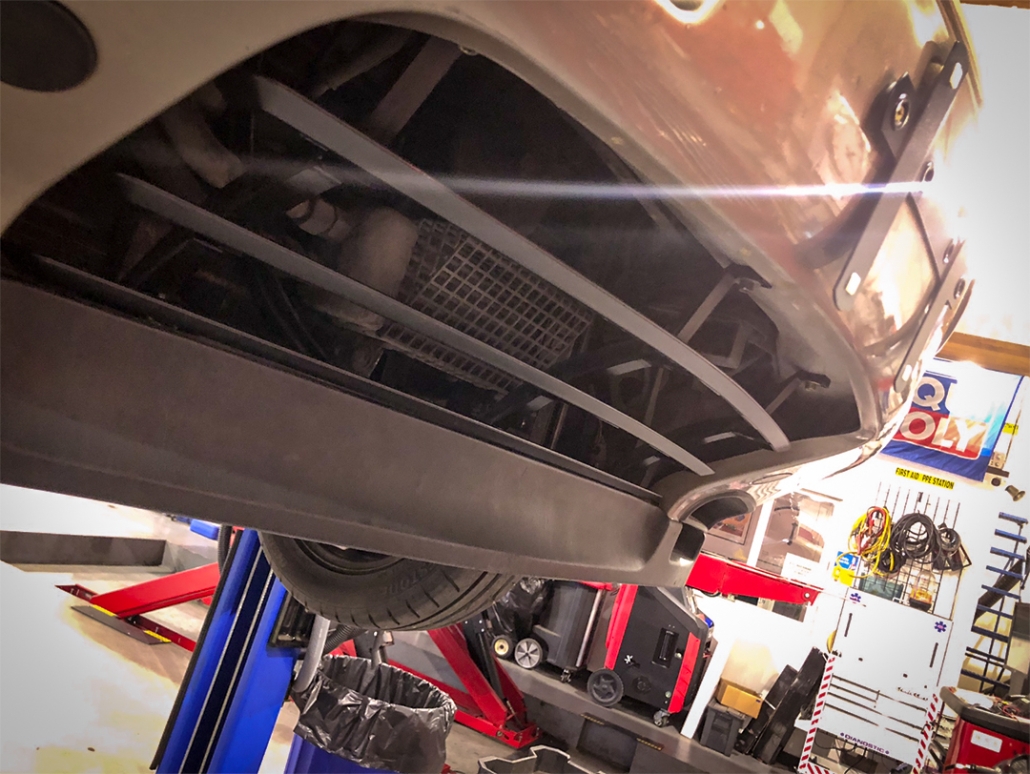
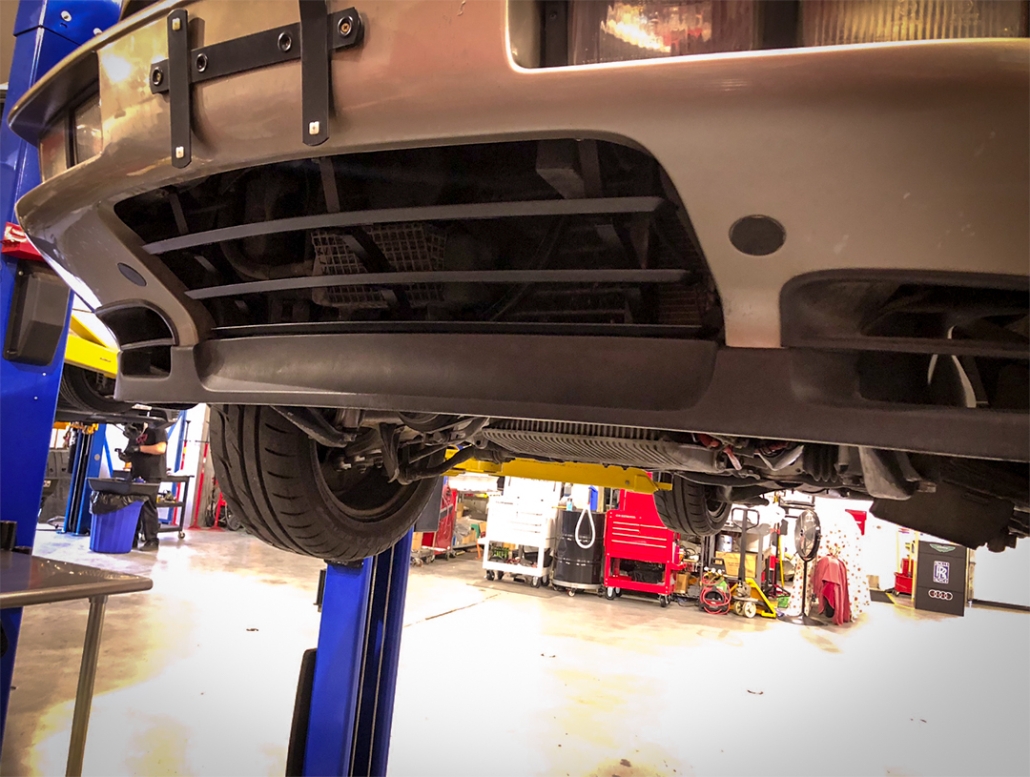
This is how it looked after installing the grill:
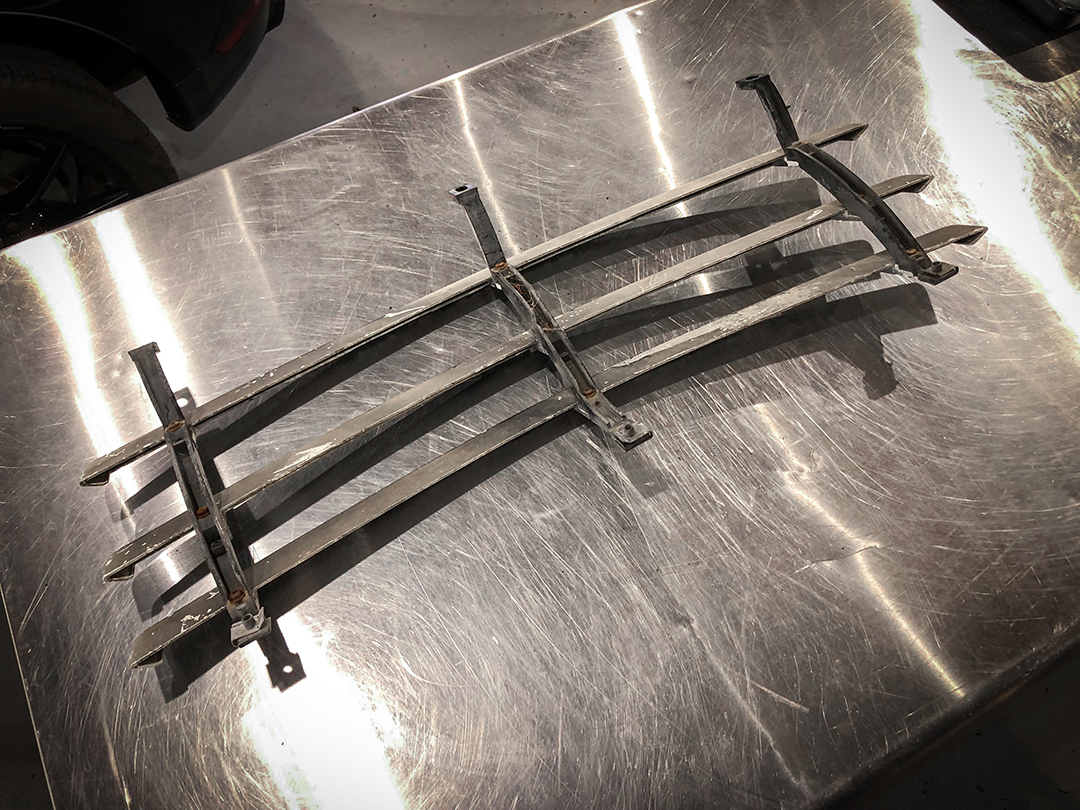
In conclusion, the assembly went perfect after sourcing those. Overall the project turned out really nice.  We believe our customer will be really happy with the final outcome. Stay tuned for our next post where we remove and install the rear Porsche 928S decals and repair the gauge cluster using 3d printing technology again.

For more information on how to get your Porsche back to OEM condition, please call 425-254-0627. You can also email us by clicking here. Meister Werks European & Import is located one block south from The Renton Landing in Renton, WA, across the street from the former Boeing Store and on the westside of the Paccar / Kenworth plant.


1960 Porsche 356b Shifter Rebuild

Last week our tech Jonathan and I were able to repair Craig’s (Rennfilms), 1960 Porsche 356b shifter. When driving this beautiful Porsche, It was difficult to find gears and made very sloppy shifts. This was due to the fact that it was missing the main lower ball pivot. It also had some poorly fabricated sheet metal, installed from the previous owner, which was not helping the situation. We had talked to Craig about this concern the last couple times he was in for service and seat bracket fabrication. We decided now was the time to do this.

Starting the project

First, I found a photo off the internet of the exact part we needed. This is really all we had to go by. Since we only had the shifter itself. The other measurements I had were the spring size and the dimensions for opening of the lower stick. I brought the photo into Adobe Illustrator and resized the photo so the hole size slightly larger that the known lower stick size of 20mm. Based off of that, I extrapolated the degree in which the photo was taken. After that, I calculated the outer ball perimeter, ball height and overall height. 

Next, I opened up Fusion 360 to start drafting our CAD file. Using our notes from the internet JPG image dimensions, I was able to come up with this drawing.

The 3d Printer

Since we print replacement parts with high temp resin, we must calculate the shrink rate. This is typically between 1-3%. Using a little simple math, that number needed to be around 103%. For safe measure, we printed 100% through 104%. Furthermore, there was going to be some margin of error. It takes about and hour to print these, so we wanted every option when we started assembling the shifter.. The 104% part fit best, although the 103% would have worked, we wanted some tolerance.

After the part came out we post processed it in a wash / cure station. Washing it with 99% isopropyl alcohol for 10 minutes and curing it with high intensity UV light for 6 minutes. This will harden the resin and prevent it from failing in the future.

While I was drafting and printing the parts, Jonathan media blasted the shifter housing and put a light coat of satin epoxy paint on it. We would have powder coated this in house, but the customer was picking up the same day. Powder coating will add a few hours to the project. If we need to make any adjustments in the future, we will powder coat it. Disassembly is fairly simple so it shouldn’t take too much addition time.

Assembly

After post processing the parts, Jonathan and I took them to the bench to test the sizes and fitment. You can see from this photo that the fit was spot on at 104%.

From here, we performed a dry fit before lubricating the mechanism. They dry fit felt night and day better, and that was without any grease. We removed the shifter for the last time, greased up all the components and reinstalled the shifter assembly. The feel was 100% OEM and each gear was defined, with no lateral movement while in gear. Reverse felt so much different than before, which might take a little getting use to for the customer. (In a good way)

In Conclusion

Overall we were very pleased with how this shifter turned out. The customer was very pleased with the results. Considering the short wait time to make the part and its functionality, It’s pretty amazing that we can replicate parts like this. 15 years ago, this was mythology.

Since we have six different 3D printers (SDA resin and FDM filament), we have the ability to print polyurethane and other synthetic components. With build plate dimensions from 4-1/2″ x 2-1/2″ x 6″ tall all the way up to 16″ x 16″ x 17″ Tall – The possibilities are almost endless.

Information / Schedule

For more information on how to get your classic European vehicle or Porsche repaired, please call 425-254-0627. You can also email us by clicking here. Meister Werks European & Import is located one block south from The Renton Landing in Renton, WA, across the street from the former Boeing Store and on the westside of the Paccar / Kenworth plant.


Porsche Brake Pads Squeak – Explained

Squeaky Porsche brakes is a topic that comes up a lot here at Meister Werks. In some instances, days or weeks after the pads and rotors were replaced. There are many reasons that cause this. According to Porsche it’s not a bad thing. We fully understand where Porsche is coming from. Here is a very scientific TSB (Technical Service Bulletin) video on why your Porsche brakes may squeal…. sometimes.

At Meister Werks, we use high quality components when servicing your brakes. Sometimes even the highests quality parts will squeal from time to time. Here is a list of the reasons why you may be getting brake squeal.

Glazed Rotors

Porsche brakes are designed to be used. Since they are classified as performance brakes, they need to be used this way. If you are very light on the brake pedal, aka brake far before you should, this will leave a very minute amount of dust on the disc brake rotors. Furthermore, riding the brakes (having your foot on the brake pedal when you shouldn’t be breaking) will cause this to happen very rapidly. This unnecessary friction causes heat, coupled with brake pad dust, will cause it stick or bond tightly to the rotor. This is essentially making a sticky glossy surface causing the squeal. Think of a new sneaker on a freshly polished basketball court. Brake disc rotors must to be a slightly rough for brakes to perform optimally, without noise. To ‘deglaze’ the rotors, there are methods of braking to clean the disc from this coating. Later discussed in this article.

Corrosion on the Brakes

Do you experience squeaking or squealing first thing in the morning? Maybe while backing up or while driving for the for only a few minutes? One of the few reasons the brakes squeak is due to corrosion. Yes, hours, sometimes minutes after parking your Porsche, the raw steel rotors will start forming a very thin layer of iron oxide, aka rust. This is a chemical reaction between 2 elements. Iron, the material the disc brake rotors are made of, and the oxygen that is in the air. If rain or water is present, this will accelerate the corrosion process. Since water has 2 oxygen molecules, causing the reaction to take place more rapidly.  Furthermore, salt air or water will accelerate this process even faster, due to more of the dissolved ions. This means electrons can move faster. Since rusting is all about the movement of electrons, iron rusts more quickly with salt air or water than fresh water or air. Using your brakes 2-3 times will typically clear the discs from the corrosion or rust.

Cold Brakes

The same experience with squealing brakes, first thing in the morning, can also be due to cold brakes. Porsche brakes are performance brakes, just shy of what racing cars have. The compounds Porsche uses are designed to perform when they are warm or even hot. A cold brake pad or disc can cause squealing. Again like when corrosion is present, using the brakes will increase the heat, causing the squeaking to go away. This sometimes takes a little longer, 5 minutes of driving may dio the trick, but we’ve seen up to 15-20 minutes with some brakes. If you have glazed brakes, this will not go away and the deglazing process will be needed.

Deglazing Brakes

By now you are probably asking, “How the heck do I deglaze my disc brakes?” The process is quite easy and usually will yield results on the first or second pass. First, you’ll want to be traveling on a road that is void of any people, traffic, or cars in front or behind you. Second, you’ll need to have a safe stretch of road to get up to 20-25 mph. 1/8 of a mile or more is best. Accelerate your Porsche up to approx. 30-35 MPH and push the brake pedal hard. If you can get the ABS to kick on, this will also help the deglazing process. We highly suggest not performing this procedure in the rain or poor weather conditions. Furthermore, if you do not feel comfortable doing this, Meister Werks will be to deglaze your brakes for you during a test drive at your scheduled maintenance, free 30pt inspection or repair.

Here is a before and after video from the Tulsa, OK Porsche dealership:

Maintaining Your Brakes While Driving

We highly suggest using your brakes like they are meant to be used. I know this might sound weird. What we really mean is don’t brake 1/4 mile before you need to. Use firm brake pedal pressure when stopping. Riding your brakes or stopped well before you need to is probably the worst thing to do for your disc brakes. Keep this in mind when driving. Remember, your Porsche likes being driven. When you follow these rules above, your Porsche will be much happier and you can eliminate any brake noise in the future.