End All Solution to the
Liqui Moly 20L Bottles Leak
We have issues with our Liqui Moly 20L bottles always leaking. We received 2 racks from Liqui Moly that each hold 6 – 20L bottles. 12 total. Our local Liqui Moly rep said this has been a problem over the years. However he did offer some advice…
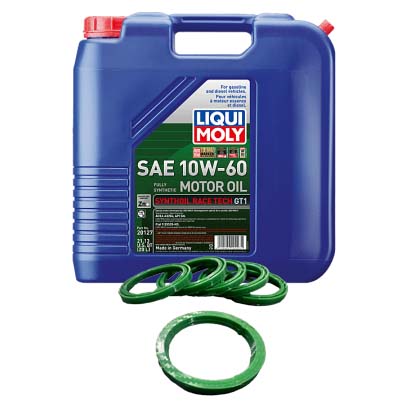
- If you are using the Liqui Moly white foam seals (29130), these are 1 time use only. They still work, but you MUST replace them every time you reuse a old drain cock. According to our Liqui Moly Rep, these are the old version and have been superseded.
These seals have been superseded to the black PVC Viton seals. They still work but you must replace them every time you remove the drain cock assembly.
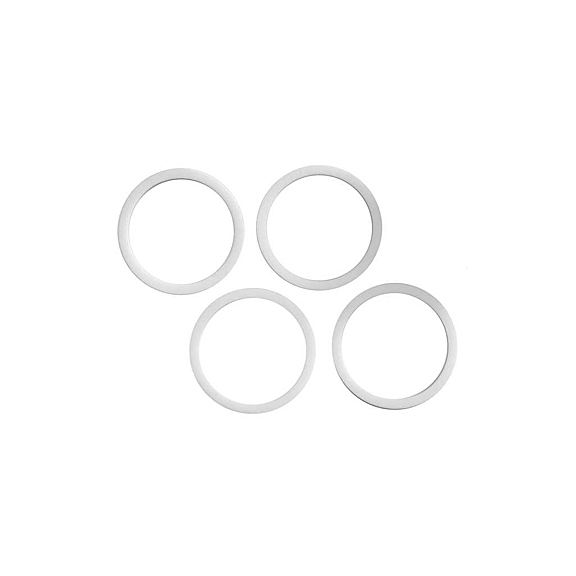
- The prefered “New” seal is the PVC Viton black rubber o-ring seal that the new drain cock kits come with. Part No.: 7924

-
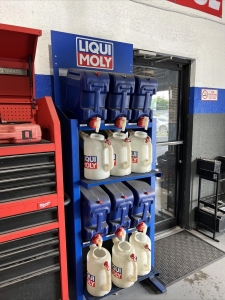
This is a photo we found online of another shop with the same problem. Note, they have 6L bottles to catch the oil, just incase.
When installing a new seal, do not over tighten the red cap. If you over tighten the cap it will deform the bottle and leak.
- Screw on the cap on until it stops.
- Give it 1/16 of a turn. Maybe around 5 ftlbs / 7 nm MAX.
- Rack your bottle and check for leaks about 10-15 minutes later.
- If it’s leaking, clean the leak first. Then give it another 1/16 turn and check it again in 10-15 minutes.
-
Furthermore, when installing a new seal, lightly coat the seal with the fluid you are putting the cap on. This will help promote sealing.
-
Remove the security ring before installing. If you do not remove this ring, it will not allow you to tighten it all the way and it will also leak.
- Make sure the air release has a hole in the bottle.
- If your bottle is on a Liqui Moly 20L rack, before draining the fluid for the first time, you must first drain some oil out, then puncture a hole under the cap. If you don’t it will leak from the air release hole.
- If you do not put a hole under the air release cap, full bottles may leak on hot days.
- Always close the red air drain cap when your done filling. This will create a vacuum if any start to come out and keep the fluid loss to a minimum.
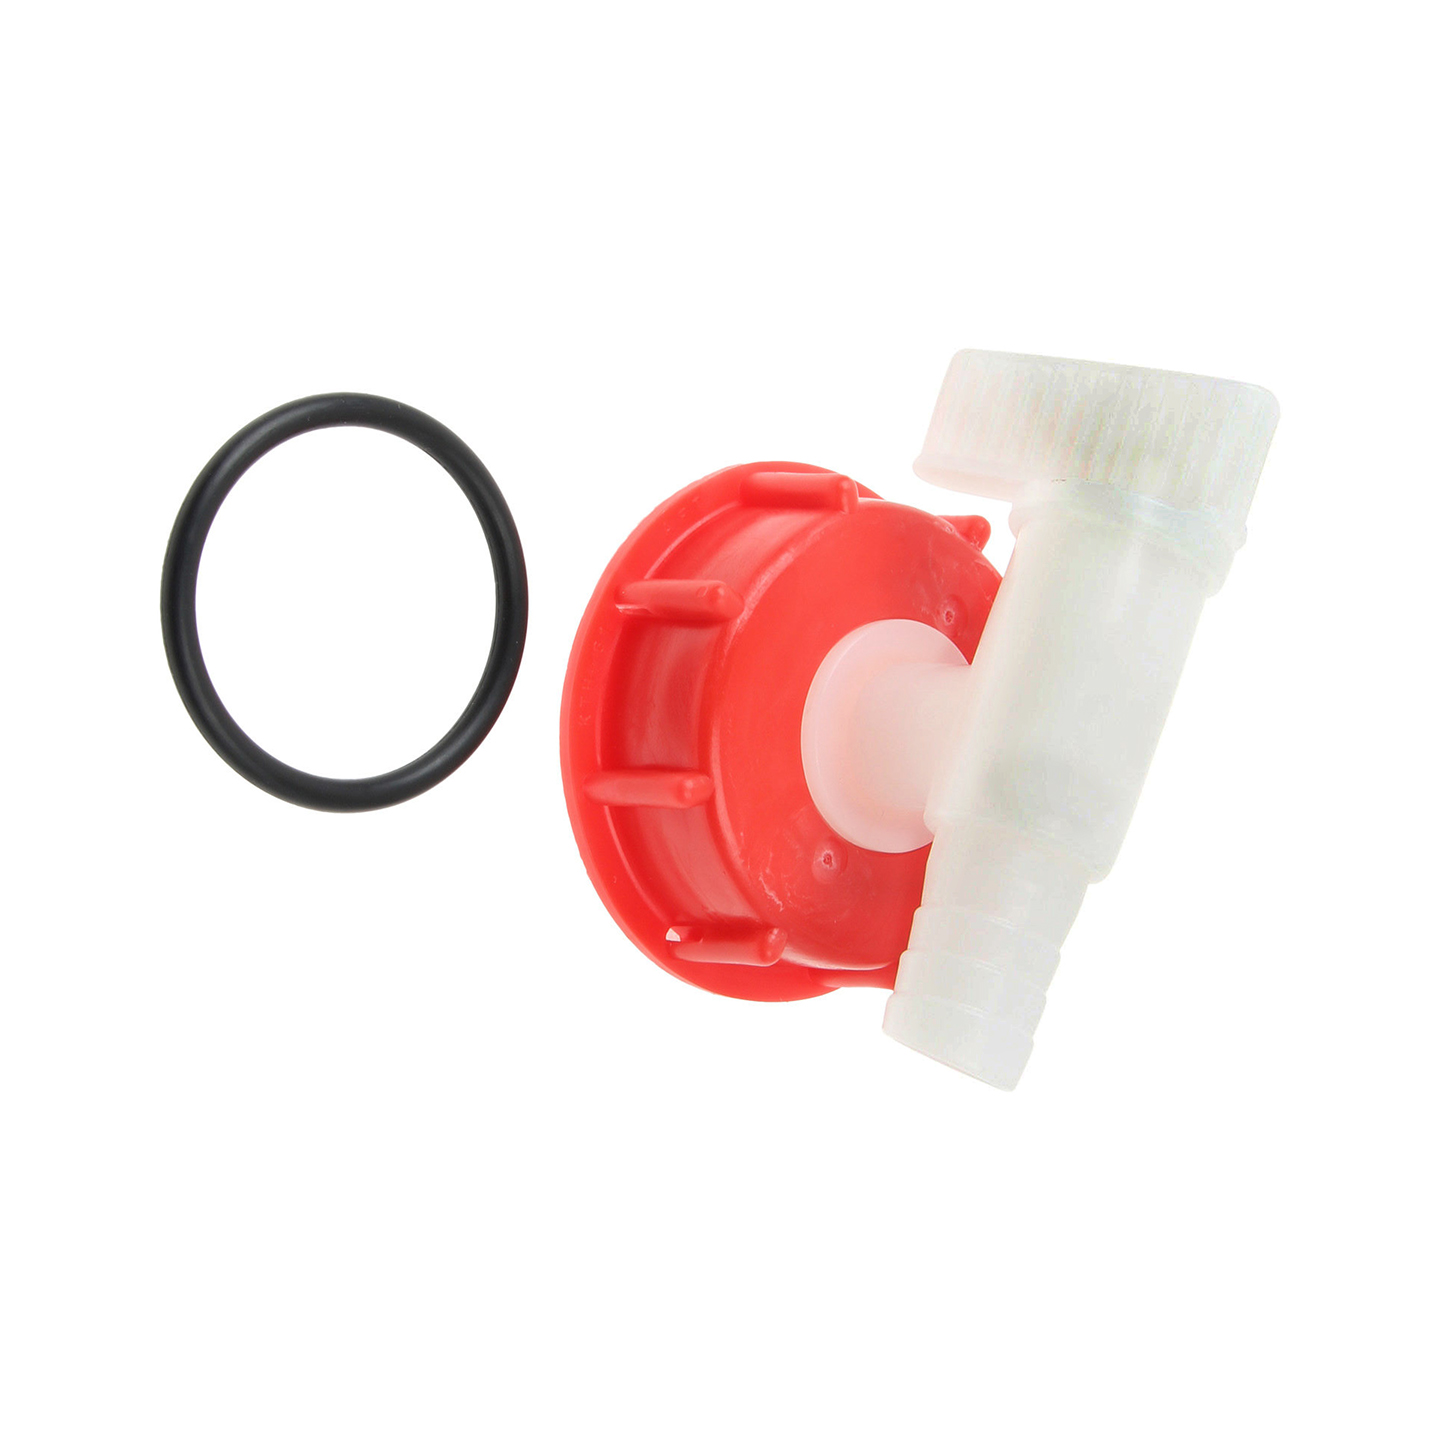

The Liqui Moly 20L Bottles Leak Solution:
Liqui Moly does not sell the PVC Viton seals separately right now. Our Liqui Moly rep said there is a link to buy the same size seals that Liqui Moly uses in their drain cock kits. They do not work that well either. That is why we came up with our own solution. Polyurethane seals. We 3d print poly seals and tested them over the last few months. Once we installed these, the bottle never leaked. You can purchase those on our other business e0-commerce site by clicking here

Why replacing rotors is necessary
on European vehicles
Why is Replacing Brake Rotors with new pads on your European vehicle is necessary? This is because old rotors can have uneven wear, grooves, or be too thin after a full brake pad life, which degrades new pad performance. It is standard practice for German cars like Porsche, VW, Audi, Mercedes-Benz, and BMWs to recommend replacing pads and rotors together as a matching set. This is to ensure optimal braking and prevent issues like noise or shuddering.
 The Reasons Why
Replacing Brake Rotors
is Necessary
- Uneven surface: After a brake pad’s lifespan, the rotor’s surface is no longer flat. New pads require a smooth surface to “bed in” properly.
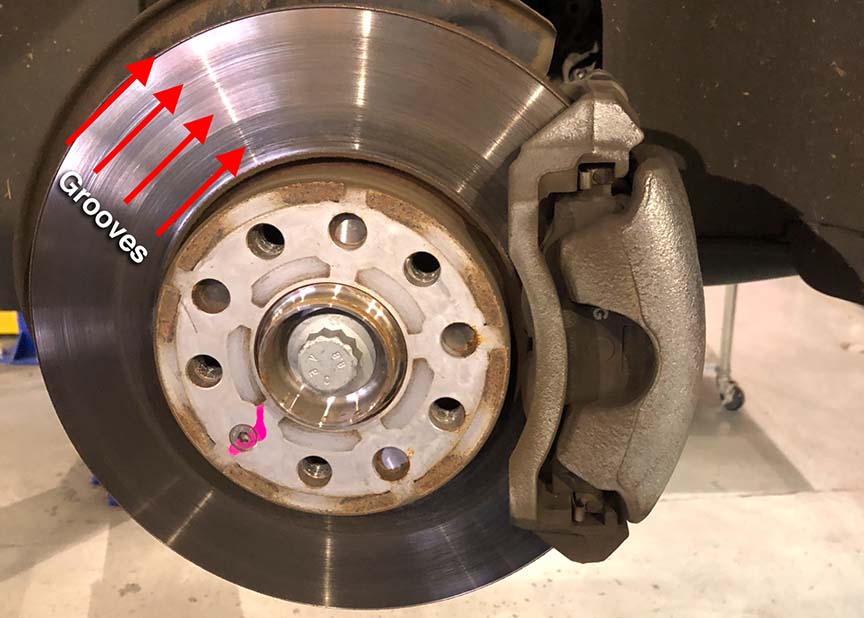
- Grooves and scoring: Worn pads can create deep grooves on the rotor surface, which will prematurely wear down new pads, cause noise, and reduce braking performance.
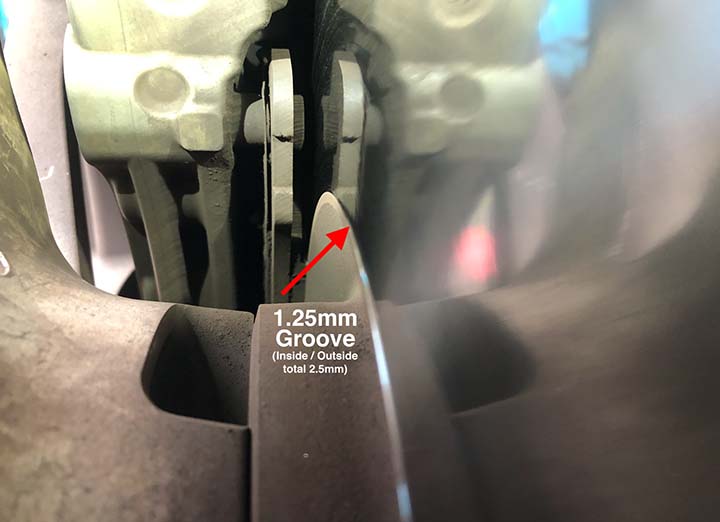
- Minimum thickness: Rotors have a minimum thickness specification. If they’ve been worn down below this point, they are unsafe and must be replaced.
- Warping: A vibrating or pulsing brake pedal often indicates that the rotor is warped, which is a condition that cannot be fixed with new pads alone.
- German car specific recommendations: German manufacturers like Audi often recommend replacing rotors with every pad service to ensure consistent, high-performance braking.
- Corrosion: Over time, rotors can develop rust or corrosion, especially on the edges. While resurfacing can remove some surface rust, it can be cheaper and more effective to replace them, particularly if there is significant corrosion.
What to do?
- Inspect: Meister Werks qualified service technicians will measure your rotors and pads to ensure they are above the minimum thickness. Furthermore, we check for signs of warping, deep grooves, or excessive rust.
- Replace: If the rotors have wear, grooves, warps, or too thin, they need replacement. After 100% worn pads, the rotors typically need replacement. However, we will let you know the pad and rotor thickness. As a result, it’s highly likely that your vehicle will need new pads and rotors. This is so they operate with proper function and safety.
- Resurfacing is Not a Option: Resurfacing is an option for some vehicles. However, replacing is necessary on all modern European vehicles. This is because resurfacing removes too much material, making them thinner than the worn rotor. Resurfacing seams like it could be cheaper. However, the additional labor time it takes to resurface. This additional labor costs the same as New Brake Rotors.
ACC Alignment? Do you need it? Checking Your European Car’s Safety Systems
Your modern European car is smart, however it may need a ACC Alignment. It may have Advanced Driver Assistance Systems (ADAS). These features keep you safe and make driving easier. Key systems include Lane Departure, Dynamic Cruise Control, and Adaptive Cruise Control ACC Alignment.
But this technology relies on perfect sensor alignment. If the sensors are off, your safety features will not work right. We can check and fix this for you.

How to Know if Your Car Has These Features
These systems use special cameras and radar. Here is how to check your European car:
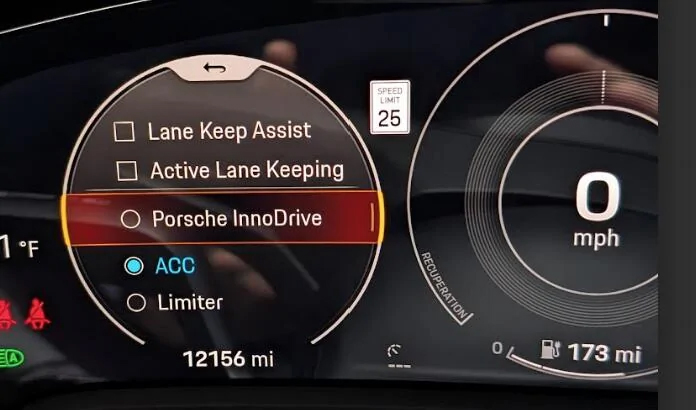
1. Adaptive Cruise Control (ACC) / Dynamic Cruise Control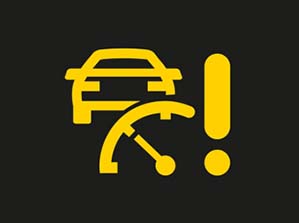
- Look for a Radar Sensor: Check your car’s front grille or lower bumper. You might see a flat, plastic square or a dark plate. This is often where the radar unit is hidden.
- Check the Steering Wheel: Look at your cruise control buttons. Standard cruise control only has a speed setting. ACC has extra buttons. You will see an icon showing two cars with adjustable distance bars between them.
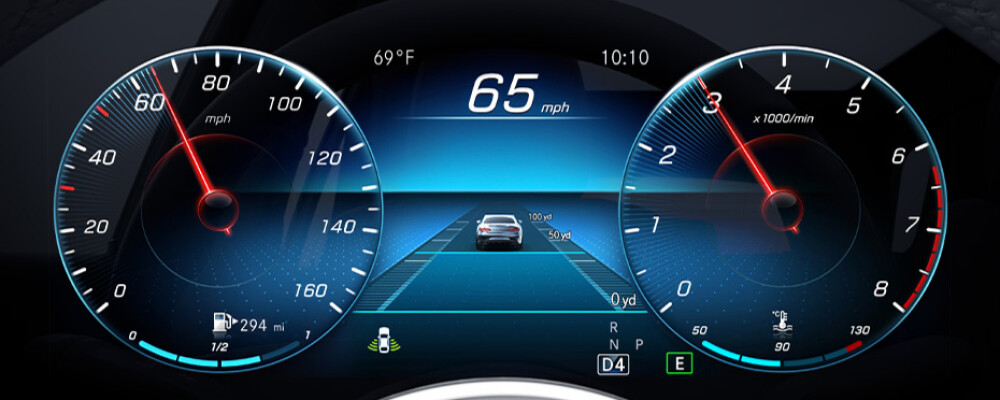
- Test it Out: On the highway, set the cruise control. If your car automatically slows down behind a car and speeds up when the lane is clear, you have ACC.
2. Lane Departure Warning / Lane Keeping Assist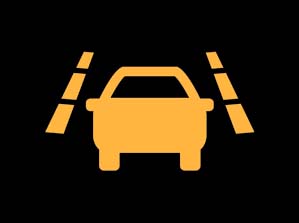
- Look for a Windshield Camera: Look at the top center of your windshield. It is usually behind the rearview mirror. You will see a small camera lens inside a plastic housing. This camera tracks the lane lines.
- Check for a Control Button: Look for a button on your dashboard or steering wheel. It often has a picture of a car veering toward lane lines.
- Watch the Dashboard: If your car has the feature, a small icon of lane lines will light up when the system is active.
Signs Your Safety Systems Need ACC Alignment Service
Even a small bump can knock these sensors out of position. A perfect ACC Alignment is key for these high-tech parts. If you notice any of these signs, your car likely needs this alignment service.
- Warning Lights are On: Your dashboard shows an error message. It might say “ACC Unavailable” or “Lane Assist Inoperative.” The car is telling you something is wrong.
- Unexpected Braking: Your Adaptive Cruise Control acts strangely. It might brake hard for no reason. It may not slow down fast enough for the car ahead.
- Wrong Lane Alerts: Your Lane Departure system alerts you when you are clearly in your lane. Or, it fails to warn you when you actually drift out.
- Recent Repair Work: Any time your front bumper, grille, or windshield is replaced, the sensors have been moved. Also, a wheel alignment or suspension repair can change the car’s angle. This change affects sensor aim.
The Meister Werks Alignment Solution
We specialize in precision ACC Alignment and ADAS calibrations. We use factory-level tools for your European car. Our experts restore your car’s safety systems to perfect working order. This makes sure your Lane Departure and Dynamic Cruise Control keep you safe.
Do not ignore dashboard warnings. Do not trust an unaligned safety system. Contact Meister Werks today to ensure your technology is protecting you completely. You can contact us at 425-254-0627. You can also schedule an appointment or receive a quote by clicking here. Meister Werks European & Import is located one block south from The Renton Landing in Renton, WA, across the street from the former Boeing Store and at the westside of the Paccar / Kenworth plant.
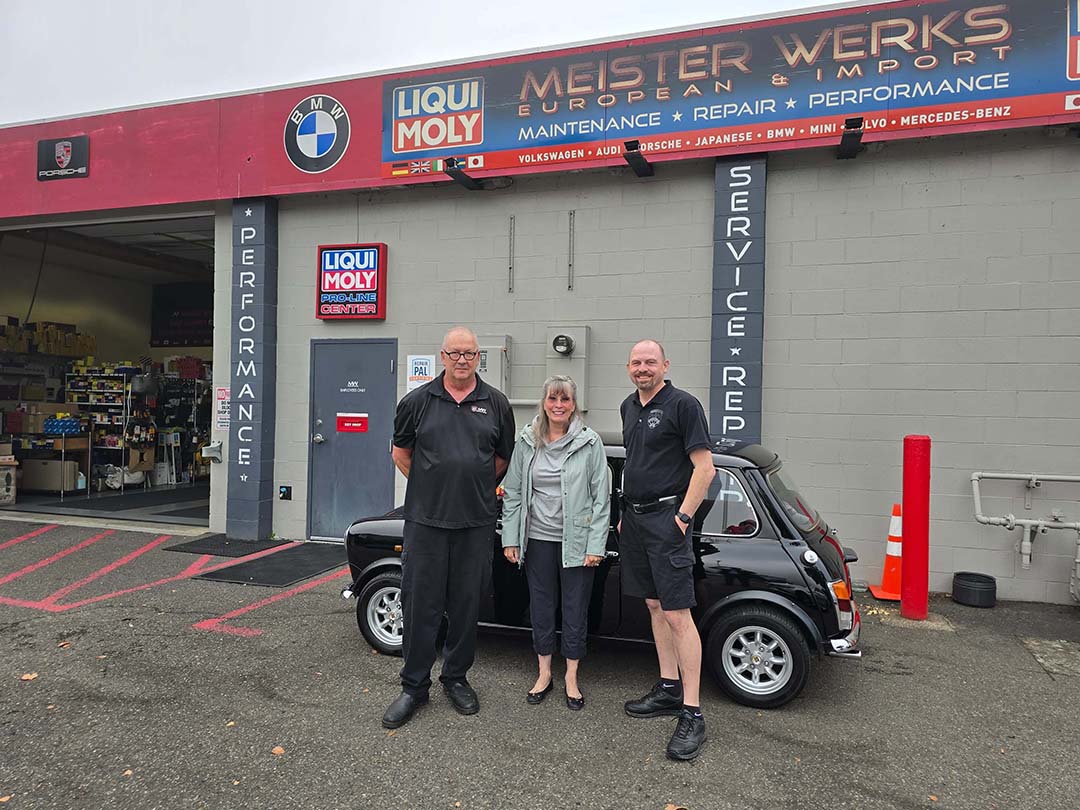
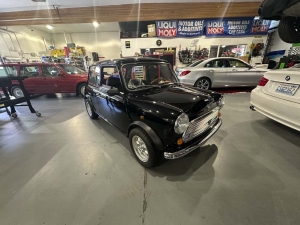
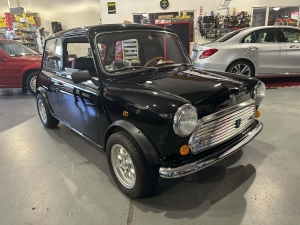
Giving a 1990 Classic Mini Cooper a New Lease on Life at Meister Werks European!
Here at Meister Werks European, we absolutely love all things European automotive. But there’s something extra special about a Classic Mini Cooper. These iconic little cars always bring a smile to our faces, and we recently had the pleasure of working on a fantastic 1990 model. It needed a bit of TLC, and we were more than happy to help our customer get their beloved Mini back in tip-top shape.
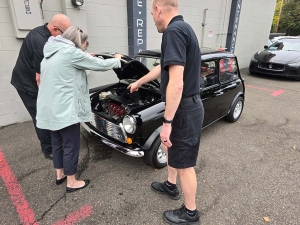
 Diagnostic & Inspcection

When this delightful Classic Mini Cooper rolled into our shop, our first step, as always, was a thorough diagnostic and a factory Classic Mini inspection. This helps us pinpoint any hidden issues and ensures we have a complete picture of the car’s health. We want to make sure every repair is done right!
Ignition System & Carbs
One of the first things we tackled was the ignition system. We performed a much-needed spark plug R&R (removal and replacement). New spark plugs mean better combustion. This translates to smoother running and better fuel economy for any Classic Mini Cooper. We also made sure the fuel system was clean by doing a fuel filter R&R. A clean fuel filter keeps dirt and debris out of the engine, which is vital for performance.
Next up, we fine-tuned the heart of this Classic Mini Cooper – its carburetor and engine timing. Adjusting these components correctly is crucial for optimal engine performance and ensuring the car runs as it should. It’s all about getting that perfect balance!
Cooling System
The cooling system also needed some attention. We performed a thermostat replacement. This is important for regulating engine temperature. Then, we tackled a installed a brand new radiator. Replacing the old leaking radiator with a new one was a must. To finish it off, we did a complete coolant flush and bleed the cooling system. This ensures fresh coolant is circulating efficiently, preventing overheating, especially important for a Classic Mini Cooper in any weather
 Brake System Overhaul
Safety is always a top priority, so we moved on to the braking system. We performed a brake master cylinder replacement.We also replaced the brake light switch at the same time. These are critical components for effective braking and ensuring your brake lights work when you press the pedal. We also replaced the front brake pads and rotors. This significantly improves stopping power. Furthermore, we replaced the hydraulic brake hoses on the car. Finally, we finished with a complete brake fluid flush. Fresh brake fluid means a firmer pedal and more reliable braking for this Classic Mini Cooper.
Tail Light Seals
Lastly, we addressed some smaller but important details. We performed a tail light seals R&R. This helps keep moisture out of the tail light assemblies, preventing future electrical issues and keeping the lights looking great on this vintage beauty.
Wrapping it up
In conclusion, after all these repairs and maintenance tasks, this 1990 Classic Mini Cooper was ready to hit the road again, running better than ever! Our customer was thrilled, and we were proud to have played a part in preserving this piece of automotive history.
For more information on how to get your Classic Mini Cooper in the shop for some service, maintenance or custom work, contact us at 425-254-0627. You can also schedule an appointment or receive a quote by clicking here. Meister Werks European & Import is located one block south from The Renton Landing in Renton, WA, across the street from the former Boeing Store and at the westside of the Paccar / Kenworth plant.


Land Rover Range Rover HSE Headlight Refurb
What Is Vapor Liquid Headlight Refurb?
The vapor liquid headlight restoration technique, also known as vapor polishing Headlight Refurb, is a modern and highly effective method for restoring hazy, yellowed, and oxidized plastic headlight lenses. Unlike traditional sanding and polishing methods that remove a layer of plastic and then apply a clear coat, this technique uses a chemical solvent to essentially melt and reform the surface of the lens, resulting in a perfectly clear, like-new finish.
Why Choose Vapor Liquid Restoration?
The Headlight Refurbishing method offers several advantages over conventional restoration kits. While traditional kits are often messy and require significant effort, vapor restoration is a quicker process that delivers superior, longer-lasting results. . Additionally, it eliminates the need for repeated polishing. This will fully restore even severely damaged lenses, giving them a durable, high-gloss finish that stands up to UV exposure.
The Process: A Step-by-Step Guide
-
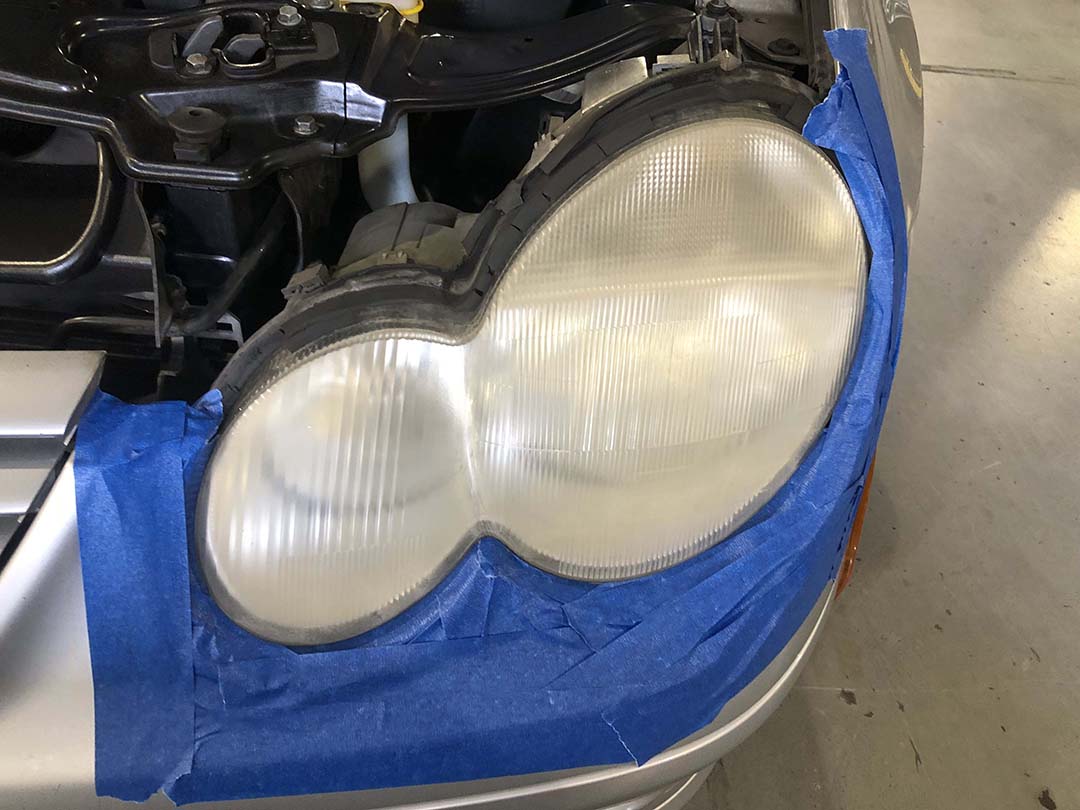
Preparation. First, you must properly clean the headlights with a degreaser and microfiber cloth. The area around the headlight should be masked with painter’s tape. This protects the surrounding paint from the vapor.
-
Sanding. We sand the headlight with progressively finer grits of sandpaper. First we start with a coarse grit (around 400) and moving up to a very fine grit (around 2000 or 3000). This removes the heavily oxidized top layer. Furthermore, it creates a smooth surface for the vapor to work on.
-
Vapor Application. A special heater kettle is used to heat a liquid polymer solution, causing it to vaporize. . The user then directs this vapor stream onto the sanded headlight lens. The vapor’s chemical reaction with the polycarbonate plastic of the lens causes the surface to become clear and smooth again.
-
Curing: The headlights are left to cure and harden, a process that usually takes a few minutes. The result is a crystal-clear lens that looks brand new.
Pro Tips for Range Rover Headlight Refurb
Range Rover headlights, like those on other premium vehicles, are expensive to replace. Therefore, using a high-quality Headlight Refurbishing method is a smart choice. Due to the shape and complexity of some Range Rover headlight designs, it is important to take extra care during the sanding and taping phases to ensure an even finish. Also, be sure to use a high-quality, professional-grade vapor restoration kit for the best results.
For more information on how to get your Range Rover’s Headlight Refurbishing, service, maintenance or custom work, contact us at 425-254-0627. You can also schedule an appointment or receive a quote by clicking here. Meister Werks European & Import is located one block south from The Renton Landing in Renton, WA, across the street from the former Boeing Store and at the westside of the Paccar / Kenworth plant.
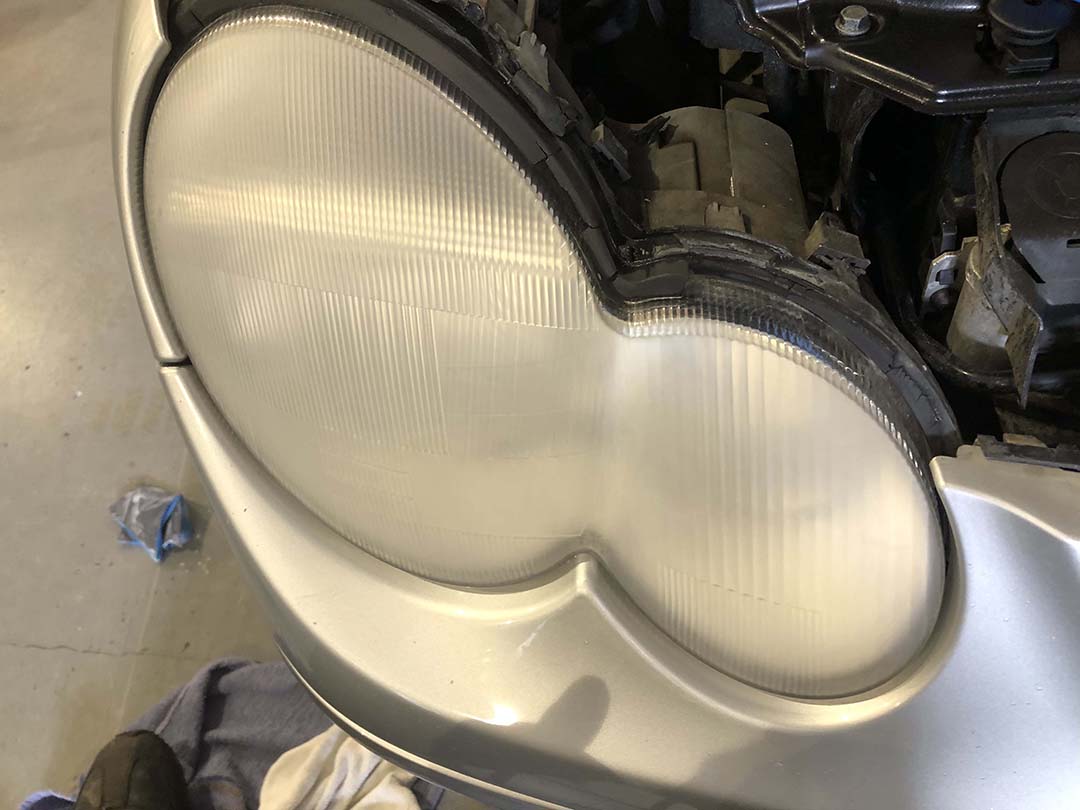
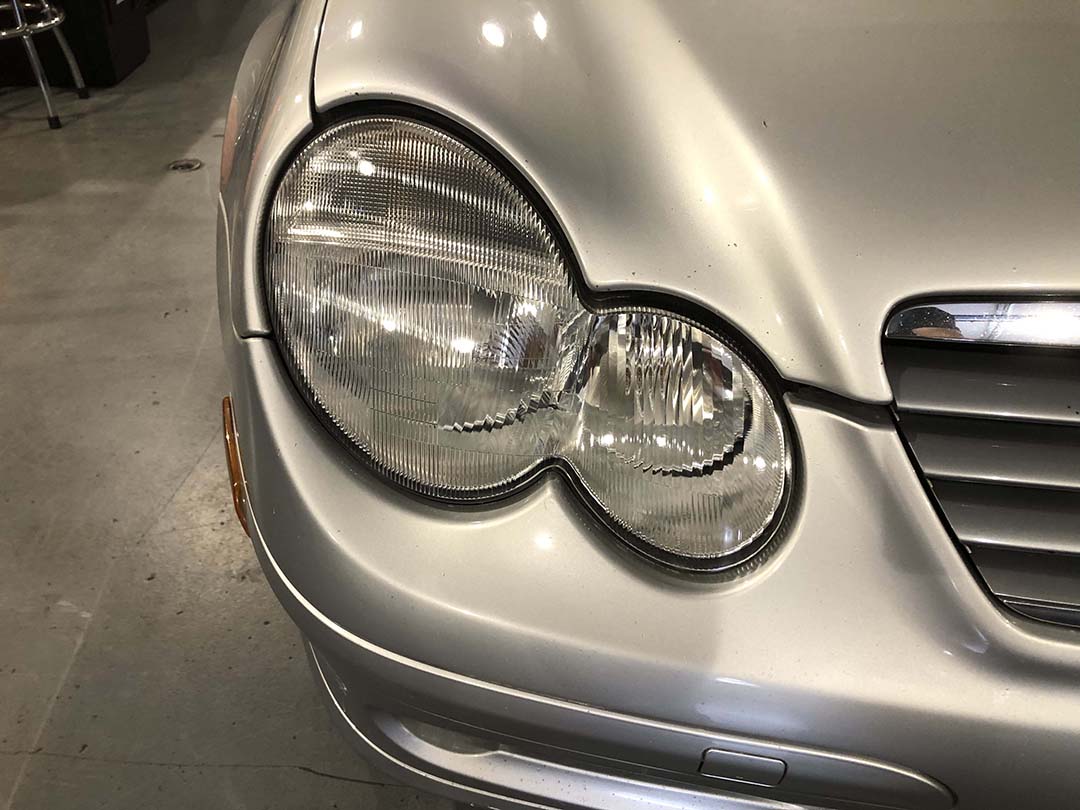
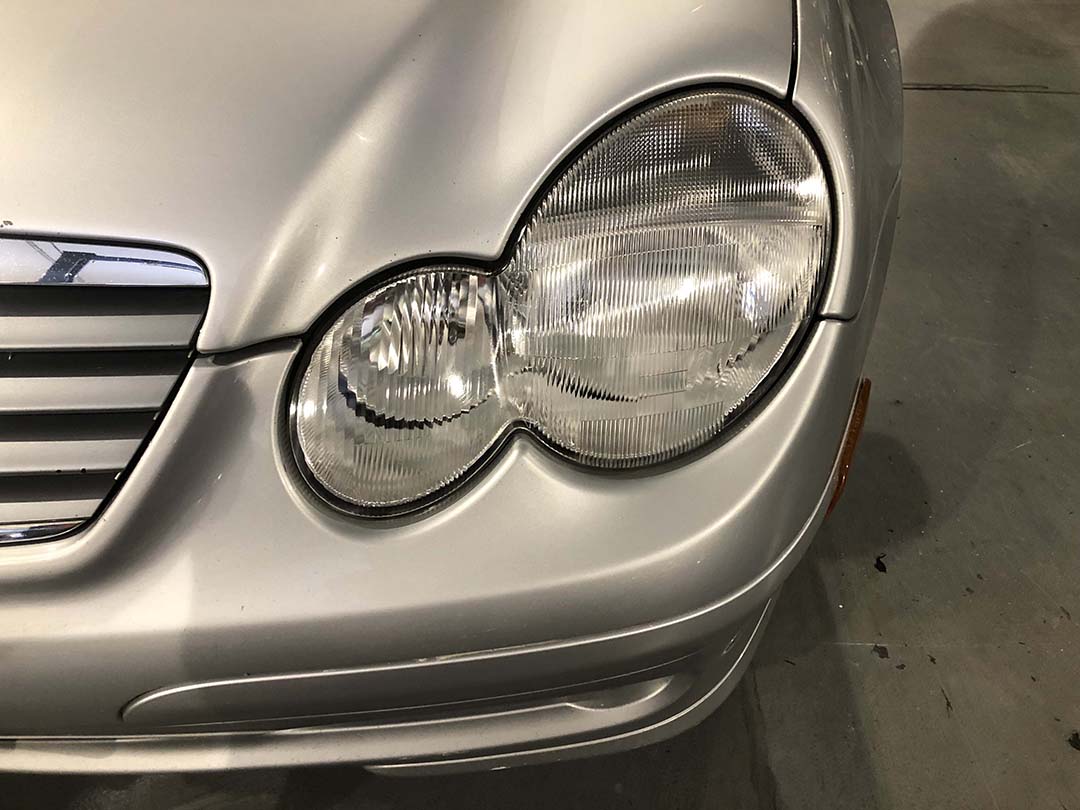
Mercedes C230 Coupe Headlight Refurbish
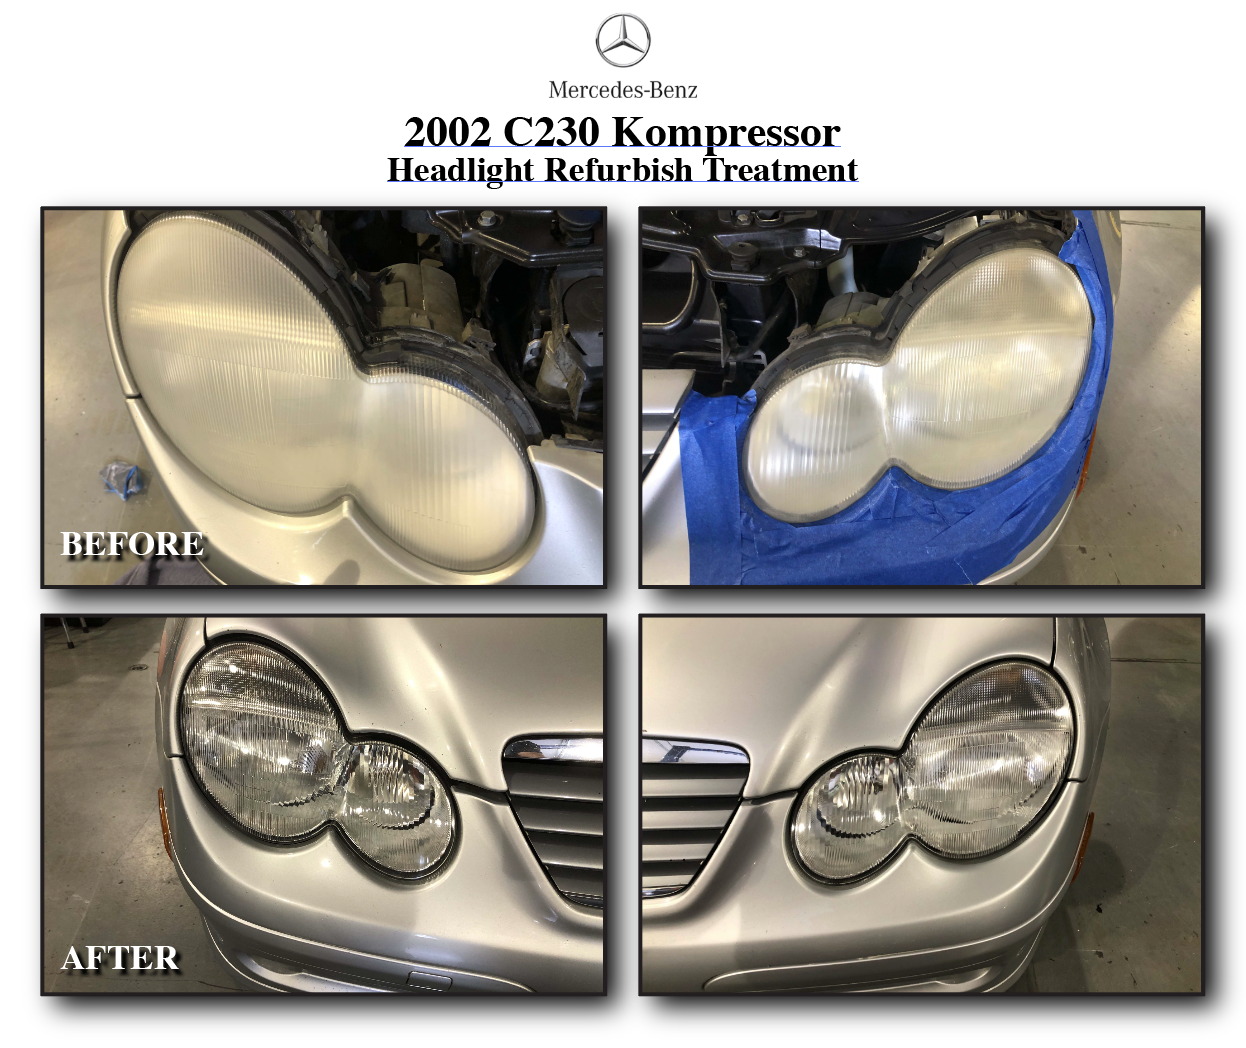

Meister Werks European & Import in Renton, the leader in European automotive maintenance, repair, and customization. Offering oil changes, Mercedes Service A, B, and C, brake flush, coolant flush, alignment, brakes, and more. Contact us today! At Meister Werks our goal is to be the best solution for our customers through exceptional service and quality workmanship. Our Warranty and Policies.